Category Archives: Plants

Made in the Shade – a unique planter pot Umbrella Stand

It’s been a busy month (ahem, yeah, my last post was over a month ago), but M and I have finally been getting this house to feel like a home. One of the projects I really wanted to tackle was for our outdoor space  was a stand for my patio umbrella. Here’s how I did it!

DIY Planter Pot Umbrella Stand

I’ve owned this super cute, small canvas patio umbrella for years now, but it’s been in storage for a good 3 years or so because our last apartment didn’t have a space for it. Now that we have a big outdoor area to play with, I really wanted to bust it out!
The problem was, after scouting around to find a nice umbrella stand, I discovered that there are basically two camps: super ugly and cheap OR classy and way too expensive. The other idea was to find a thrifted patio table – the kind with the hole in the middle – but it turned out to be a much more difficult search than expected.

Finally I decided to make my own solution! An umbrella stand that would be unique, changeable, and inexpensive! Here’s what I did:

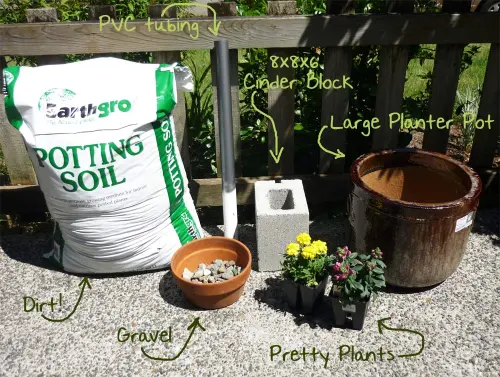
DIY Umbrella Stand Materials

Materials:
*Large Planter Pot – proportional to the size of umbrella
*Small Cinder Block (8x8x6)
*Length of PVC tubing – wide enough for umbrella handle
*Gravel
*Dirt
*Plants

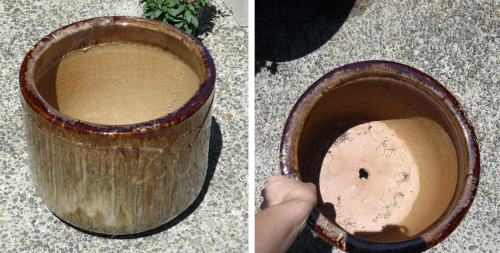
Ceramic planter with drainage hole

Be sure your pot is a good size. Since it will be outside (and have plants that need water), be sure there is a drainage hole in the bottom!

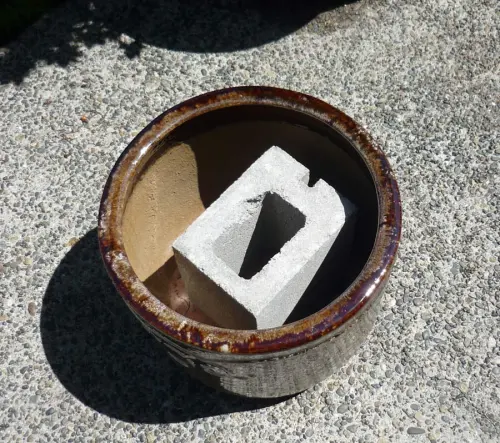
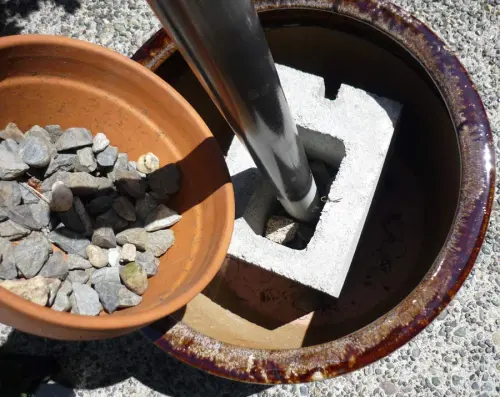
Planter with cinder block

Place your cinder block in the center of your pot. Be sure it’s in a good position to put your PVC tube right over the drainage hole.

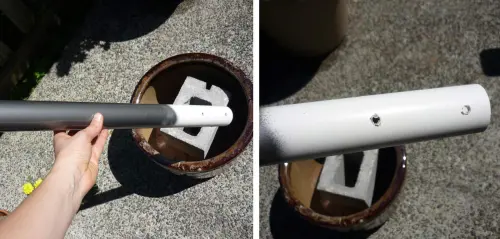
PVC tubing - Painted & Holes Drilled

I spray painted the top portion of my tubing a dark gray color, so the white PVC isn’t so noticeable. I also used a drill bit and my hand-held drill to put a few drainage holes in the bottom of the tube.

PVC & Gravel

With the PVC tube centered over the drainage hole, fill in the cinder block space with gravel until the tube is securely lodged in place.

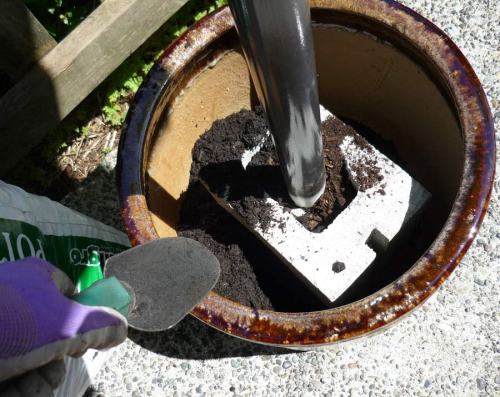
Adding dirt to the planter

At this point, make sure your planter umbrella stand is located where you want it – it’s about to get really heavy! Next step is adding your potting soil.

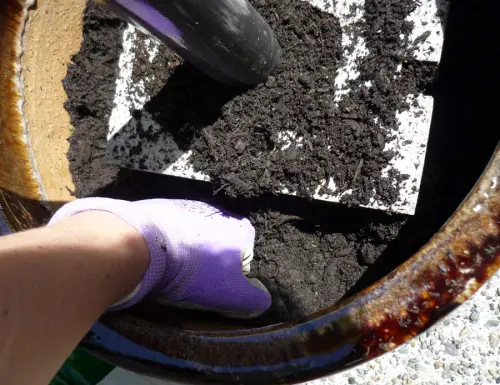
pack it in there

Pack the soil in really well around the cinder block – you don’t want it to move!

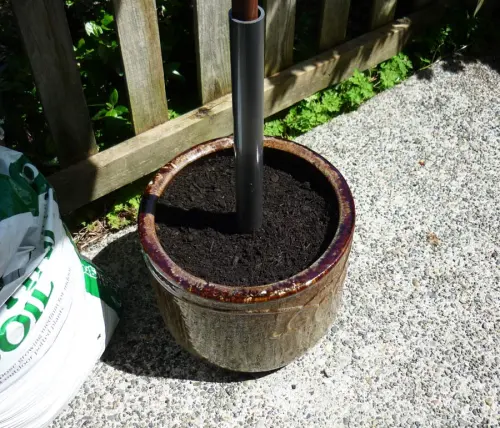
Planter filled with dirt!

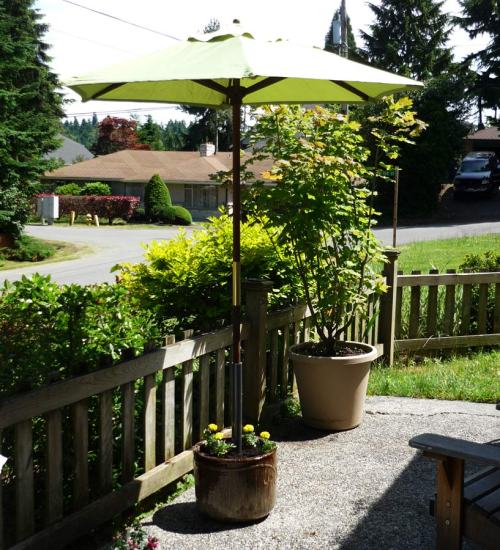
Once you’ve got the block hidden and the planter all filled, it’s time for adding pretty things! I had a few marigolds and snap dragons, but it turned out my planter wasn’t that big, so I just did the marigolds. If I were to do this again, I’d probably choose a trailing flower, like petunias or something, but I do think the happy yellow marigolds are cute. 🙂

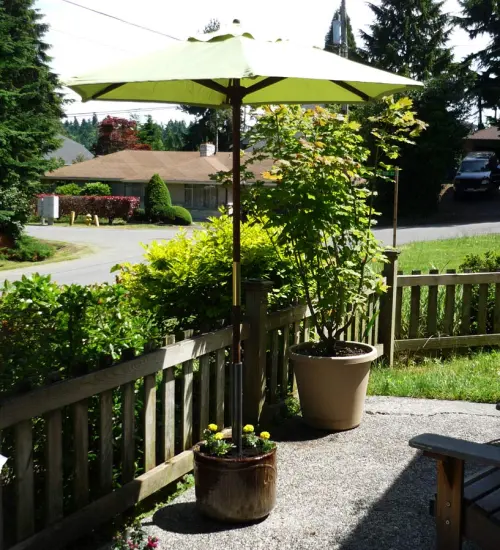
umbrella stand planter with flowers

So there you have it! Simple yet effective!
Those flowers will fill in a bit, but even sparse as they are, I really like how this project turned out! And what’s great about it is, since I didn’t use cement or something permanent to affix the PVC tubing, if I get tired of this arrangement, I can disassemble the whole thing and I still have a great ceramic pot to use!

And the break down for price is pretty great:
*Ceramic Pot: $16
*Potting Soil (way more than needed for this project, btw): $5
*PVC tube: $1.25
*Spray paint: free (already had it)
*Gravel: free (gathered from the back alley)
*Cinder block: $.95
*Marigolds: $.95
TOTAL: $24.15

So yeah, good luck finding a nice free-standing umbrella stand at the store for under $25!

Outdoor living, here we come!

And now with the summer weather finally arriving in Seattle (we hope!), we’re one step closer to some awesome outdoor living!

9 Comments

Filed under Crafts, DIY, Plants, projects, tutorial

Vine time

So I know I haven’t been posting much this month! We’ve had so much to do with the moving, and me trying to get my studio in some kind of workable order!

But here and there we are slowly starting to do some work on this new rental house of ours (which, I know is kind of a waste since we don’t own the place, but heck, we’re still going to be living here for quite a while, so we want it to be awesome).

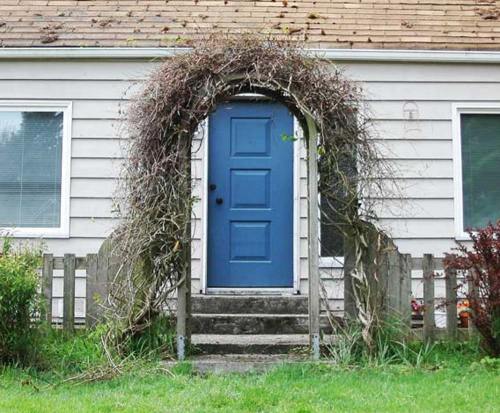
tangled mess of a vine arbor

One of the first things on my list was this terrible mess of some kind of vine outside our front door. I can’t tell you how itching my hands were to get some clippers to that thing. M pointed out that at the right angle, and if you squint, it looks like a guitarist from an 80’s hair-band. Nice.

So when I got a spare moment over a couple of days, I went to town, created piles of dead vines, and ended up with this:

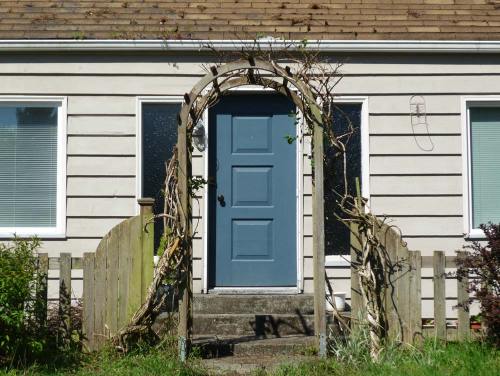
trimmed vine

Talk about a hair cut! It almost looks sad, all naked. But we can finally see some of the new growth coming in, which was all but invisible before.

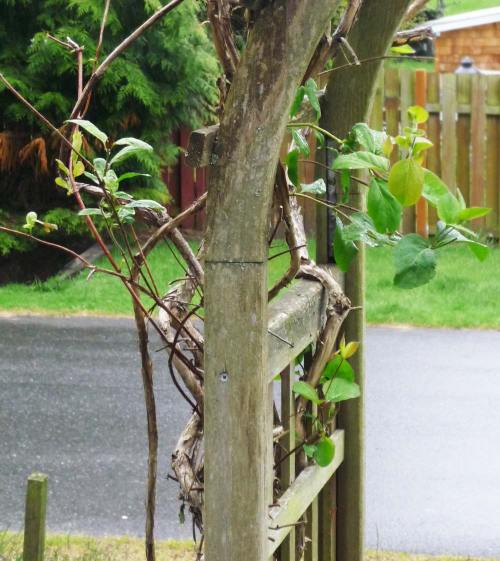
climing vine, new growth

So I’m pleased at this point, and am eagerly awaiting more new leaves (and hopefully flowers?) to show up for summer. Before I trimmed it, I thought this vine may have been a clematis (which I love!) but when my mom came over, she thought it was honeysuckle, which would also be very cool! Especially when I found this neat cupcake recipe on one of my favorite pretty cooking blogs, Tartlette. Ha, though we’ll see if I’m that ambitious when the time comes 🙂

More house and studio updates to come!

1 Comment

Filed under Day to Day, Plants

Continuing my “garden”

We had a few days of beautiful spring sunshine here in Seattle last week. It got me so revved up for planting and opening all my windows, and generally feeling spring-y!

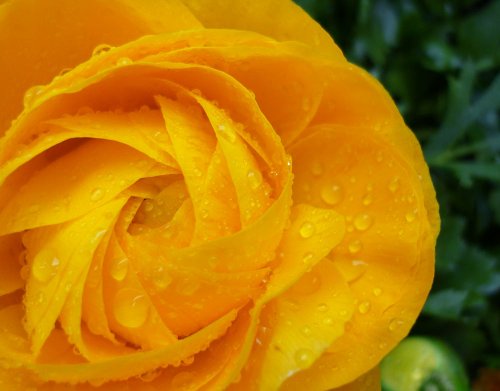
yellow ranunculus

Of course, it didn’t last long! It has been dreary and drizzly for days, with no sign of the return of the sun. But that didn’t stop me this weekend from heading to the garden center and picking up supplies.
With list in hand, I picked up a variety of lettuce seeds; compost to add to the dirt I already had; string bean seeds; cilantro seeds…

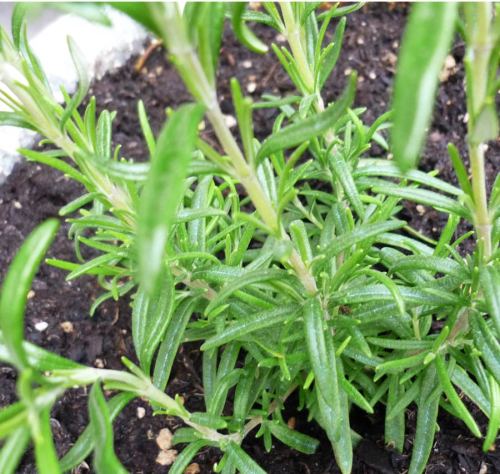
new rosemary plant

…a new rosemary plant to replace the one I’d had for such a long time (it had been sickly for a while)


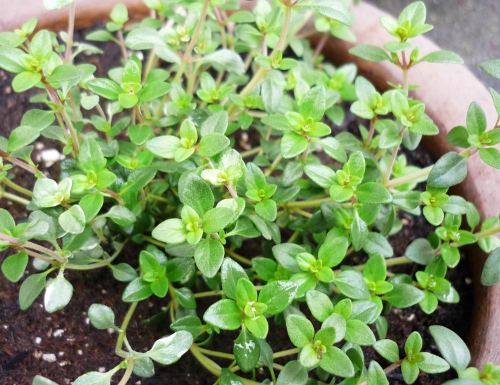
thyme plant

…And a new thyme plant – you can never go wrong with planting lots of herbs, am I right? With the rosemary and thyme supplementing my existing parsley plant (no sage at the moment – otherwise I’d break out into song).

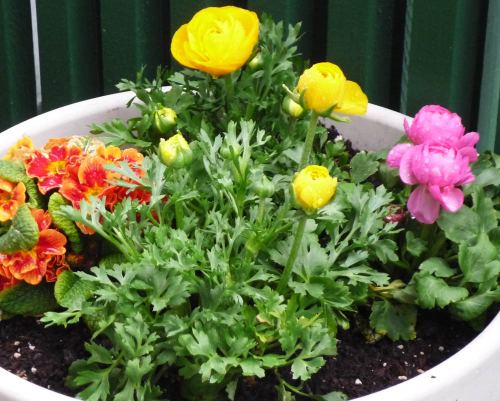
And because I was craving flowers, I also picked up a few pots of brightly colored ranunculus! A splash of color greets me whenever I look out my living room window now ^_^

potted ranunculus and primroses


So until the sun decides to reappear, I guess I’ll have to be happy with my pretty flowers and just know that real spring is coming soon!


Leave a comment

Filed under Plants

Starting my Spring “garden”

Every spring I have such great hopes of an apartment Deck Garden, but some years I just drop the ball entirely and don’t get my seeds started in time.

Not this year though! (Well, I’ve made a start, anyway)

I had a couple of cardboard egg cartons that I didn’t want to toss, and thought, “why don’t I turn you guys in to seed starter pots?!” Much more economical that buying those peat-pots, which are great, but any time I can use something I have on-hand, I’m gonna.

So, not that an idea this simple needs a step-by-step….I’m gonna do just that!

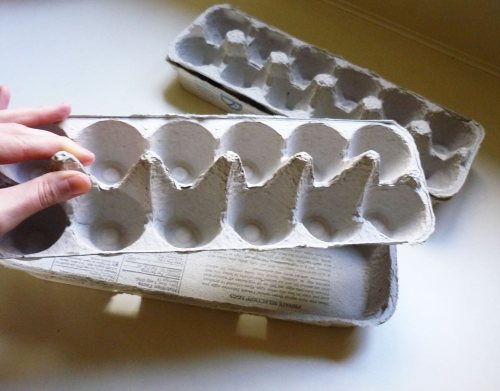
empty egg cartons, separated

So I took my lovely egg cartons and cut the tops off at the hinge. I also removed the little flappy bit at the front. Originally I was thinking I’d use the carton top as a tray, but changed my mind, as you’ll see.

egg cartons with dirt!

So logically, I took my cartons out to my deck, where I have a bag of dirt left over from some other planting project. I discovered that along with the dirt inside, it also had a whole colony of these teeny annoying fungus gnats! *Scoff of frustration*
Well, right then and there, I knew i wouldn’t be bringing my seeding pots back inside – I didn’t want to expose my indoor plants to these little pests!
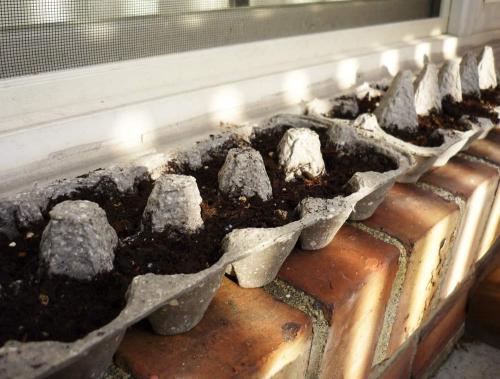
So taking my chances that these stupid bugs will disperse once the dirt is out of the closed-up bag and not harm my seedlings, I went ahead and filled my egg cartons with dirt and sprinkled in my seeds.

I’m starting slow, but plan to plant more seeds. Right now I’m just starting with LOTS of basil, and some fun decorative greenry and chinese lanterns (we’ll see if they sprout).

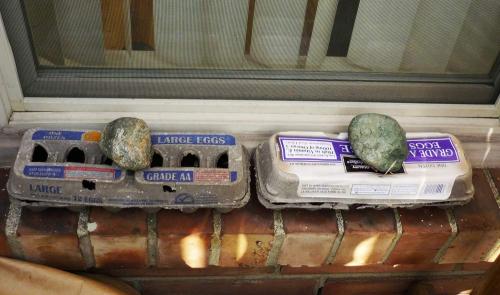
So I’m leaving my seed pots outdoors – it’s well past the danger of frost here. And just to give my seeds a little bit more security/cover I decided to use the egg carton lids as…well, lids.

egg carton seedling pots - lids on

Not very attractive, I know! But perhaps the added cover will act like a slight greenhouse when the sun shines and will warm up the seeds, and they’ll think it’s time to grow.

If anyone else wants to try out the egg-carton method of seed pots, and you don’t have the problem of pests in your soil, you can definitely do this indoors until your sprouts are ready to transplant. Just be sure you have a water-proof tray underneath, because the cartons will absorb the water and get pretty soggy. You don’t want to damage your furniture!

The absorbent nature of the egg cartons will make sure your soil stays nice and moist, incase you forget to water them for a couple of days…I’m sure this will be the case with me!

Hopefully in the next couple weeks I’ll be seeing something like this:

Basil Sprouts picture via House No.8

pretty basil picture from here!

Fingers crossed. I’ll let you know how it goes!
Anyone else getting their planting on? What do you plan to have in your garden this year?

2 Comments

Filed under Day to Day, Plants, tutorial

Propagating Succulents

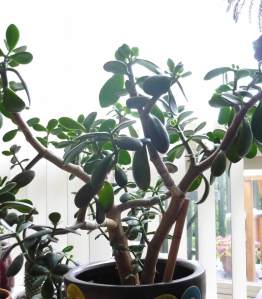
A year ago I introduced you to Clement, my jade plant. Yup, he’s still thriving and takes up the big space in front of our living room window!

He does get so over-zealous with his new growth sometimes, though. Not that I don’t love that he’s getting bigger and fuller – I want him to grow as huge as possible! But it can be a strain on his branches if his growth goes unchecked. There was a time when he was growing faster than his trunk and branches could support – his big fleshy leaves got so heavy and numerous, his branches started to sag, and a couple of times  he even fell over completely! (Not a fun thing to come home to, I assure you.)

So I have gotten in the habit of pruning Clement every so often. I find that this ensures he doesn’t get too big for his britches. Also, any small branch that I prune generally stimulates two new branches to grow, thus making his new growth fuller, instead of long and spindly.

But of course, I end up with all these beautiful jade cuttings, and I hate to just toss them. So here’s what I do…

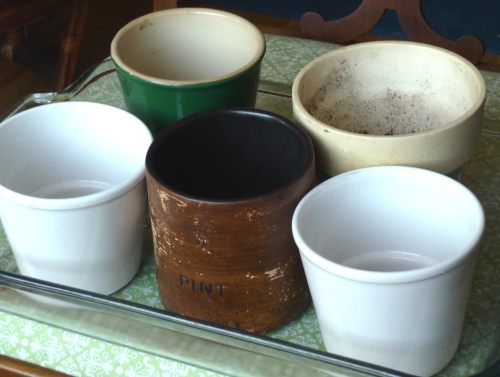
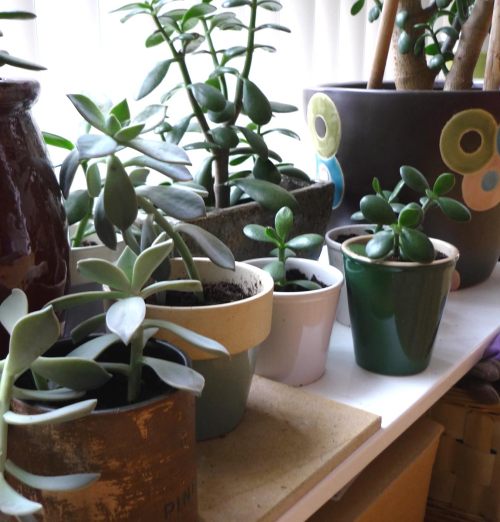
I collect little ceramic pots at the local Goodwill (no more than $1 each).

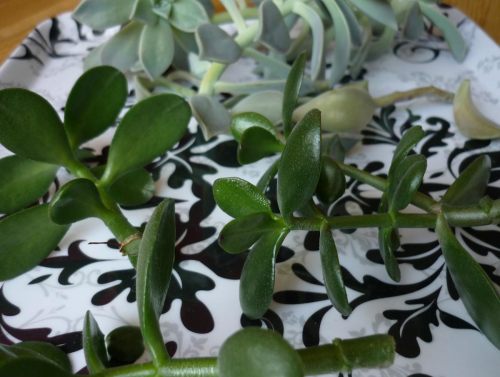
I make sure that the jade (and other succulent) cuttings have healed over at the cut  – this only takes a day or so. And then, with fresh dirt, I plant them in the pots.

Succulents are really hardy little plants – they are survivors. And that makes them so easy to propagate. After a few weeks, these little guys will be pretty established in their new homes, with little roots growing from the stems planted in the dirt. Just amazing.

I plan to give most of these away as gifts, because I am of the mind that everyone should love jades! 😛
But I am also working on an new idea for my Etsy shop – making small ceramic pots and propagating jade plants for them. I mean, my shop is called Jadeflower. It makes sense that I should sell some jades! We’ll see how this idea pans out.

Until then, happy propagating!
3 Comments

Filed under DIY, Jadeflower Ceramics, Plants, projects

Homemade boutonniere

Let’s talk about wedding flowers.

For whatever reason, despite being a self-proclaimed crafty person, I have never gotten the hang of flower arrangements. Perhaps this is just due to not receiving any guidance or instruction in the art of arranging flowers, but the fact is, if you give me a pile of beautiful individual flowers, I will most likely make them look terrible in a vase.

So, I was completely inspired when I read this post on Once Wed several months ago on DIY herbal boutonnieres. The tutorial was so simply laid-out and gave such a charming end result, it made me think that even I could craft a beautiful homemade boutonniere out of plants I have growing on my balcony!

So here is my own attempt to make a green and white boutonniere from plants I already have. This is really only an experiment – I don’t know if I intend to make the groomsmens’ boutonnieres for the wedding day, but at least now I know that I could!

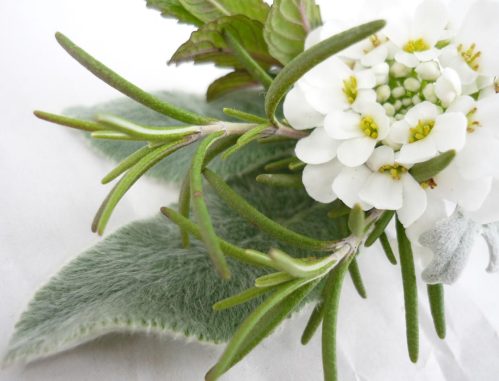
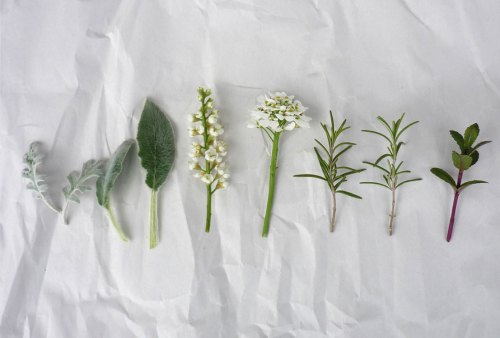
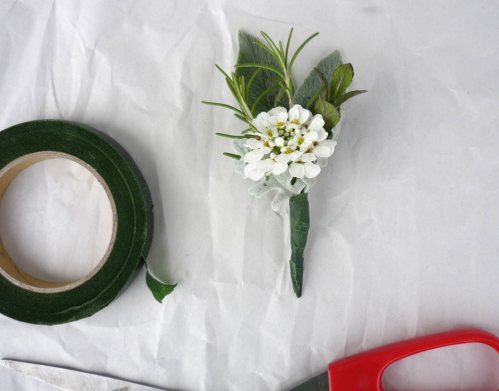
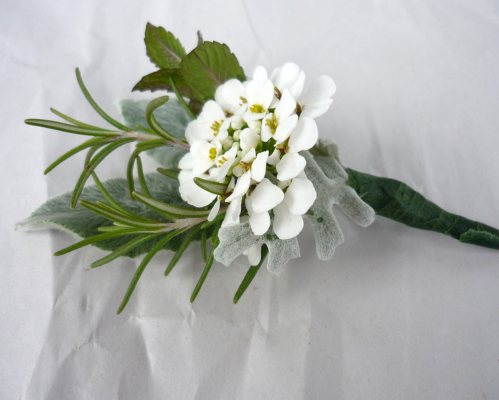
So I gathered up a small stash of plants: Dusty Miller, Lamb’s Ear, two “flowers” I knicked from roadside bushes, rosemary, and mint

I made all of the stems roughly the same length, and then began layering them. I knew the lamb’s ear should be in the back for a nice back ground, then the rosemary and mint, then the white flower-thingy in the middle, and then the Dusty Miller sprigs in front.

I held all the stems together and then wrapped them up with floral tape. I was amazed at how easily I could make something that looks this good! It looks like a real boutonniere, haha 🙂


So when M got home from work I showed him what I had whipped up, and to my delight he thought it was fantastic. He especially loved that it smelled of rosemary (he loves rosemary). And then he kept petting the lamb’s ears.

So I’d say this was a successful experiment. Even if I don’t end up doing the flowers myself, we’ll at least be able to tell our florist that we want something similar to the herbal boutonniere I concocted. It feels like progress 🙂

3 Comments

Filed under Crafts, DIY, Plants, Wedding

Pretty Tulips

Happy April 1st! Nope, no April Fools jokes for me today. But I do want to share some pics of my pretty pretty tulips that have finally bloomed!

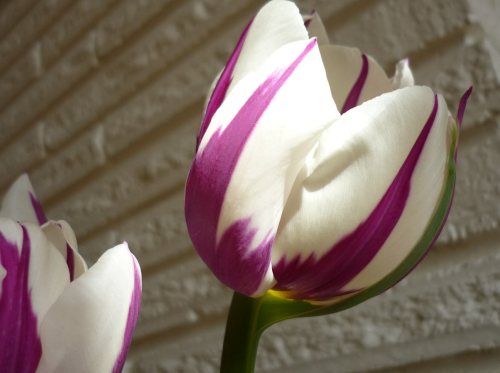
These purple and white tulips are just gorgeous.

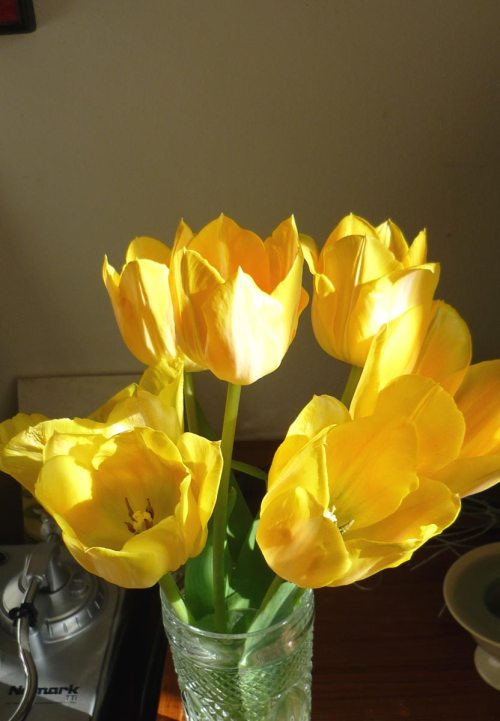
The yellow tulips were the first to bloom 🙂

I still have some fiery orange ones and cool minty green ones on the way.

There’s nothing quite like being able to step out your door and pick beautiful fresh flowers. This is my kind of instant gratification ^_^

2 Comments

Filed under Plants

Bountiful Flowers

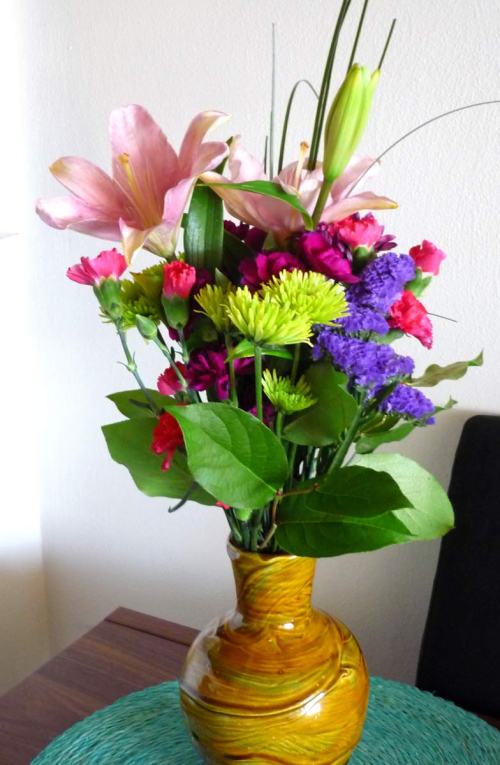
It was a flower-filled weekend, and now I have a flower-filled apartment! *Sigh* I love the effect fresh flowers can have on a room (I just wish they weren’t so expensive! They really are a luxury).

colorful birthday flowers

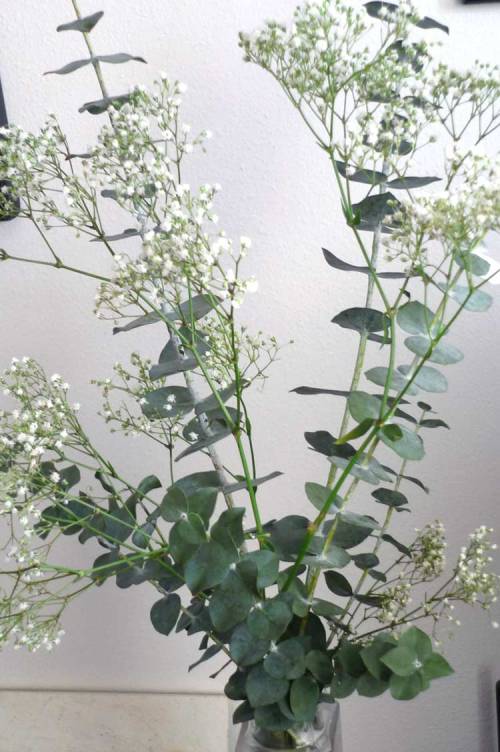
This cheerful gift (thanks, Doury!!) gave me two other arrangements I spread around the living room:

baby's breath and eucalyptus

and:

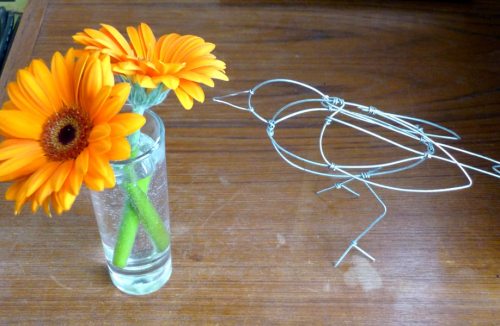
orange gerbers with sparrow

These sweet little orange gerber daisies are brightening up my computer area 🙂
And the wire sculpture was another birthday present – from my artist friend; definitely check out his other stuff on his Etsy site jakobi! So cool ^_^

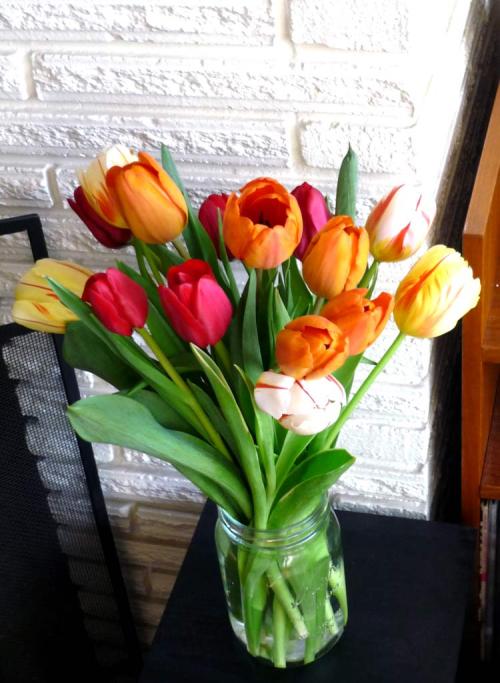
springtime tulips!

Our darling friends from Bellingham brought these gorgeous tulips (I love tulips!).

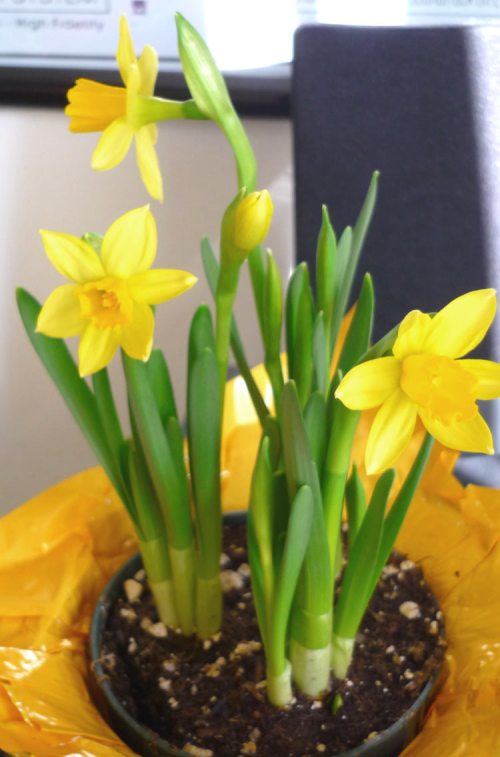
And my dear friend Natalie gave me the cutest little daffodils. They hadn’t bloomed yet when she gave them to me, but two days later, look how happy they are!

mini daffodils

I will be so spoiled with all these pretty flowers around! When it’s your birthday, I guess you get to be spoiled a little, heehee 🙂

3 Comments

Filed under Day to Day, Plants

Spring in the air?

Despite the bitter cold stretch that we had back in December (see this post), today is positively balmy! It’s almost 60 degrees, for crying out loud. And do I detect a slight springy aroma wafting on the breezes? It smells like flowers, I swear. Daffodils, maybe.

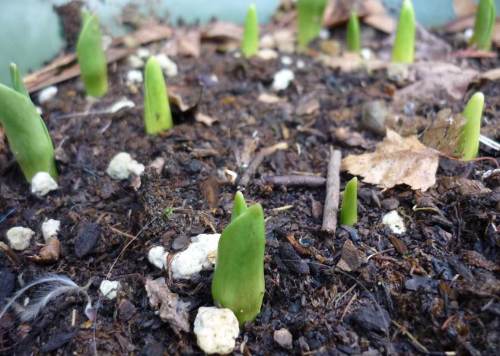
I was thinking I just had springtime hopes on my mind, but when I checked on the tulips I planted in November, this is what I found…

tulip sprouts!!

These guys are totally jumping the gun. It’s still only January! Don’t they know that?

I planted my bulbs in large planter pots, so they are above ground, and therefore, due to the warmish weather must think it’s time to grow. That’s fine by me, I just hope we don’t have some freak cold front rush in and kill my little babies.

But I am really excited to have pots and pots of brightly colored tulips this spring! Last year M & I took a day trip north to La Conner and the Skagit Valley Tulip Festival (dorky I know), but the tulips were so pretty! I couldn’t help myself ordering a whole box of bulbs of the varieties we liked the best.
Roozengaarde tulip farm was where we went and who we ordered from. And it was so convenient – I ordered them in the spring; forgot about it; then in November I get my box of bulbs all ready to be planted just then in order to bloom in the spring! Easy!
I just hope that this growing early thing doesn’t hurt them. I’ll be sure to post more pictures when they start to bloom. 🙂

Leave a comment

Filed under Plants

Meet Clement

I’d like to introduce you to Clement – my beloved jade plant. I enjoy all kinds of plants, but there is something special about jades – they are just so easy to love! Those big fleshy leaves, bright green color, so easy to care for. They just seem cheerful!

Starting my final year of college back in ’03 I became fixated on the idea of having a jade in my dorm room. I assumed this would be no problem to do, since back home you could find these little guys in any grocery store with a plant section. However, attending a school in northern Indiana, I found out that they would not be so common. After treking around to general stores and every nursery in the area, I almost gave up hope. But at a last resort, I found my little jade through Ebay (of all places). A fellow in California mailed him out to me, wrapped in damp newspaper. Here’s Clement when I first got him.

[baby clement]

baby clement

I named him Clement, for my grandfather, who had passed away relatively recently. I hope you won’t think it disrespectful of me. It was a way for me to keep his memory close.


So it’s been several years now, and Clement is still with me, going strong (even after many moves, one being cross-country in a van filled with stuff!). And it’s been so fun watching him grow, and even propagating a few mini-Clements along the way. Here he is now in our living room window.


clement 2009

clement 2009

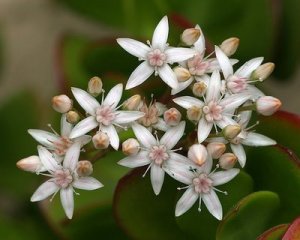
Isn’t he huge?? My hope is he’ll grow into a huge tree (they can get quite big, with huge trunks), and my best hope is I’ll get him to flower one day. Jades bloom so beautifully! Clusters of tiny star-shaped flowers that are so sweet. This is why I named my Etsy site Jadeflower – for the hope that the most precious and beautiful things are yet to come, but always hoped for.

jade flowers

jade flowers

1 Comment

Filed under History, Plants