Category Archives: paper

From Pin to Party

I agree with the majority of folks out there that Pinterest is pretty fabulous. While I’m not one of those people who has to “pin all the things!!!” I do enjoy having a visual space where I can collect all my favorite finds from around the web in one neat little package. And it’s a great planning tool! You can find all my pins right here.

I used my Pinterest as a planning tool for an event I put on over the weekend. I celebrated my 30th birthday! In reality, I had a 4-day celebration, starting on my actual birthday (on Thursday) and through to Sunday, but my little party was Saturday, and Pinterest was a big help in guiding my inspiration.

Ever since my wedding, I really enjoy planning parties and executing all the little details! This one was no exception. I had a handful of fun craft projects.

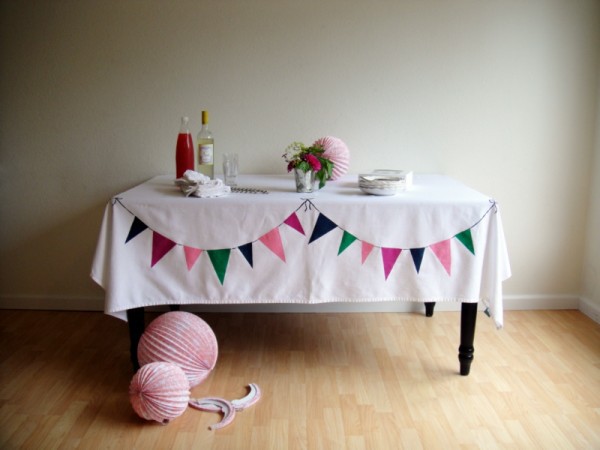
First, I have been enamored of this tablecloth idea from the moment I saw it:

DIY Bunting Tablecloth from The Sweetest Occasion

 I loved this idea for ages before I got around to making my own painted tablecloth.
I took a different design direction, but the process was the same.

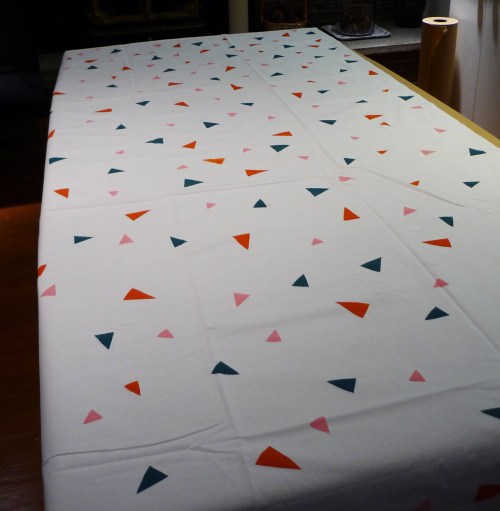
Start with a plain white tablecloth or fabric. Line underneath with paper or dropcloth. Painting supplies: Acrylic Paints, Acrylic Fabric Medium, Sponge brush, paper templates cut into triangles

I wanted a kind of triangle confetti pattern, and I chose a dark orange, pastel pink and dark turquoise for the color palette. Fun party colors!
After an hour or so of stamping (M helped too, the sweetie!) this was the final result:

party tablecloth, finished!

Once the paint had thoroughly dried, the final step was to heat-set the paint with an iron (following the directions on the Fabric Medium bottle).

Once craft down! Many to go!
Next, I’ve loved the use of paper for decorations for some time. Whether it’s craft paper, patterned colorful paper, or tissue paper. Love it all! And these images really got me inspired:

pretty paper decorations, image from LeSueur Interiors

Pretty paper medallion backdrop, from Kara's Party Ideas

Tissue Paper Decorations, from realsimple.com

So for about a week prior to my party, I started folding paper into fans, and taping those fans into round medallions. All different colors and sizes. Some with petal edges, some just straight, some with doilies in the centers, some without. All of them coordinating with my blue-orange-pink color scheme.

My Paper Medallion Party Backdrop

I love the overlap of all the different sizes and colors! It just looks so cheerful!
To hang them, I used clear fishing line taped to the back of each medallion, then tied to clear push pins into the ceiling, visually gauging where each one would look the best with height and overlap. You could see the pins and the line if you looked closely, but for the most part they were invisible!

For party food, I knew I wanted to keep it simple (purchasing my veggie platter, sliced cheeses, hummus and pita, and mixed nuts), because the one thing I wanted to make myself was Cake Pops!

Cake Pop 101, from A Beautiful Mess

This was my first experience making cake pops. And in fact, my first time eating cake pops! But I’ve loved the idea and the cute presentation ever since first seeing it on Bakerella. I bought my sticks and candy melts from Michaels, and was all set to concoct these pretties.
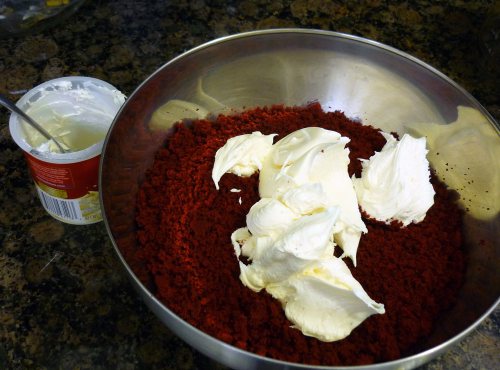
I discovered that my mixture was far too gooey! One boxed cake + 1 can frosting turned out to be a very wet ratio! Next time I make these pops, I’ll start with less frosting and mix in more as needed, rather than dumping the whole can in at once (live and learn)!

cake pops, before being mixed

So as a solution, I quickly baked a half-recipe for simple chocolate cake from scratch, and added that to the mixture, which helped firm up the “dough.” All in all, my pops turned out super cute, and they were a big hit with everyone.

My finished cake pops

Another sweet treat that Pinterest inspired was Italian Sodas!

DIY Italian Sodas, from the Salty Pineapple

So I made  my own little drink station with fun soda-fountain glasses and fun stripey paper straws from HeyYoYo on Etsy!

Italian Soda station

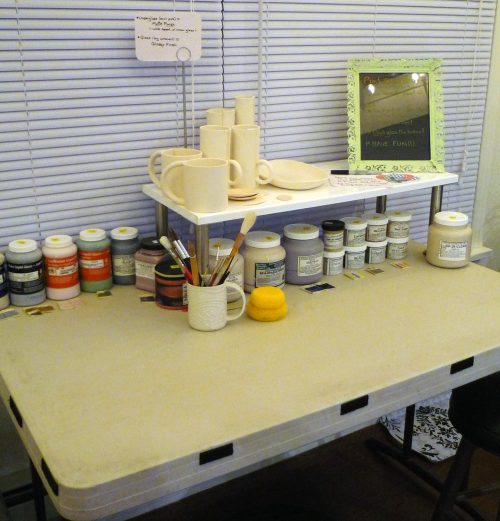
My last bit of party planning wasn’t inspired by anything I’d seen on the webz. But as a ceramic artist, I wanted to share a bit of myself with my guests, so taking a cue from those “paint your own pottery” places, I set up a crafting table where people could glaze a piece of pottery I’d made especially for the occasion.

my very own "paint your own pottery" station!

A random assortment of mugs and vase cylinders that could be personalized! It took some coaxing to get people to jump in, but those who did enjoyed it! I’ll be firing those pieces later in the week and sending it to my friends who participated! 🙂 Hopefully they’ll be a fun little souvenir of the evening.

So in conclusion, I had a fantastic time turning 30.  And I am truly looking forward to a new decade and a new chapter in my life. I absolutely loved my 20s, but I have no regrets leaving them behind. Maybe because I enjoyed my 20s so much is why I’m optimistic about the next 10 years! Life is basically good, and I have a lot to look forward to. Not least due to my wonderful friends and family. ❤

5 Comments

February 28, 2012 · 7:48 am

I’m back! Let’s start the wedding recap!

I’ve been such a remiss blogger as of late! Since the wedding (one month already!) I’ve had so many things I’ve wanted to share, post-event, that it’s been too overwhelming to even begin. But last night M & I got to meet up with our awesome photographer (Sheila Addleman) and now we have all our wedding photos at our disposal on disk – it’ll be much more fun to show you wedding details using Sheila’s amazing pictures.

So where to begin?

There are so many things, I guess I’ll just jump in with an overall look at the wedding day.
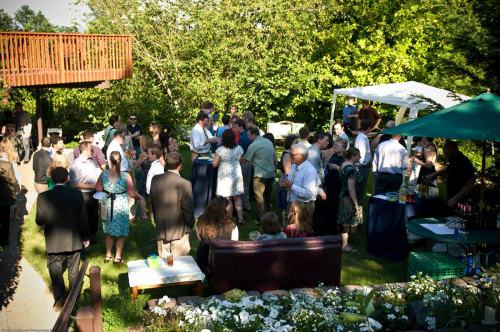
It was, in every sense of the term, a do-it-yourself wedding. Every detail was created by M or myself, or friends and family, and the entire execution of the event was achieved by the loving effort of a whole army of people that descended upon my parents’ house the few days before (and after) the wedding day. I still have an overwhelming feeling of gratitude to everyone who helped with our special day! There was really just so much love present, it was amazing!

Though most of the set up had been done the day before, there were still plenty of things to do the morning of the wedding, and you could find the bride either on a ladder with a power drill, hanging up panels of fabric, placing signs down the street, giving people jobs to do, greeting people and generally running around like crazy (though not actually going crazy).

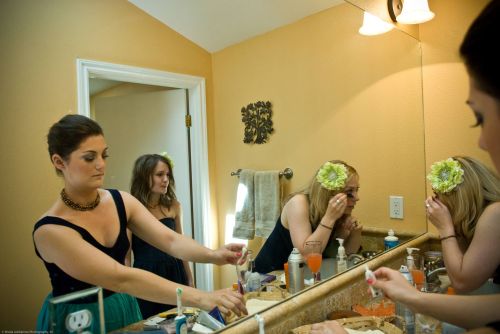
My wonderful bridesmaids arrived around 10 AM and they also helped with last-minute details. But at noon, we officially stopped helping, and went to get ready in my parents’ bedroom & master bath. Sandwiches and mimosas in hand.

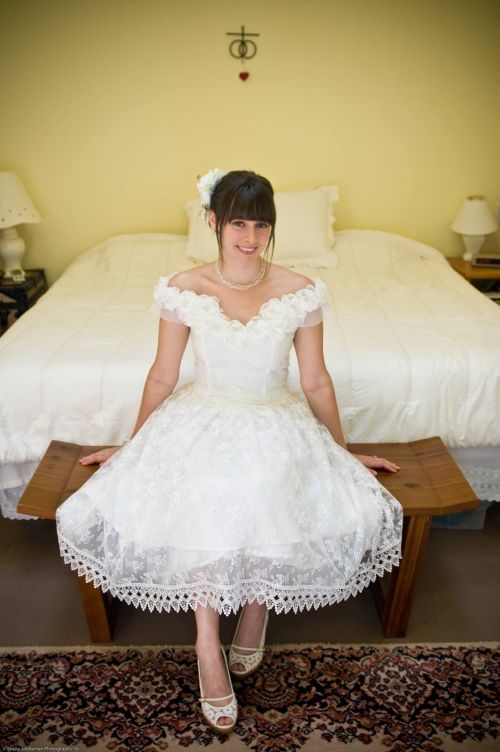
Everyone did their own hair and makeup (with help from each other). I did my own make up, and Brenna – wonderful friend, bridesmaid, and fashionista – graciously did my hair in a messy bun with little wispy sections framing my face, topping it off with my custom-made fascinator. I loved my hair!

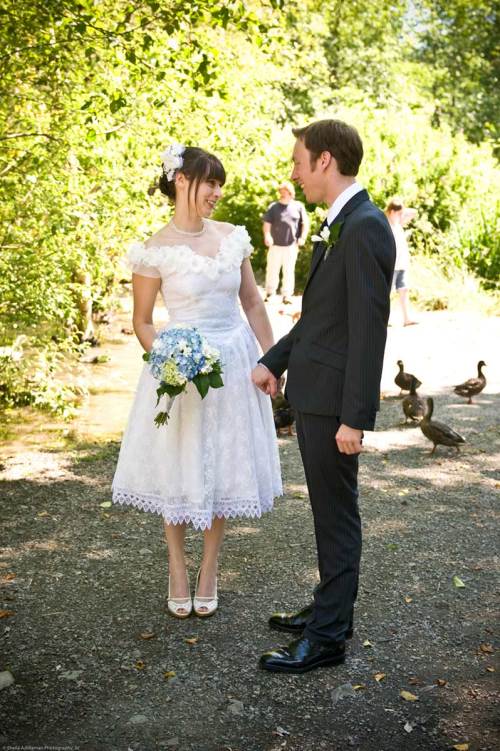
M and I did a quick “first look” and then we headed down to the local park to take the wedding party pictures. Sheila did such a wonderful job!

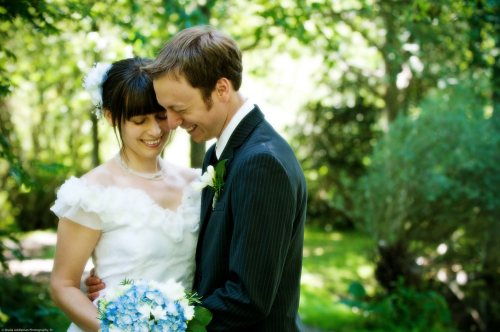
She kept us moving and totally put us at ease. The shots she captured were on the casual side, but dreamy, which was perfect for the overall vibe of the day.

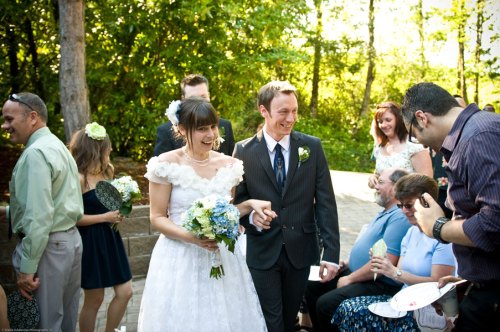
The wedding ceremony itself was perfect. My mom officiated (which was risky I know, but she is a professional and kept it together the whole time, haha), and she used just the right balance of humor and sentimentality.

I thoroughly enjoyed looking out over our gathered friends and family and seeing lots of eyes being dabbed (even the men!).

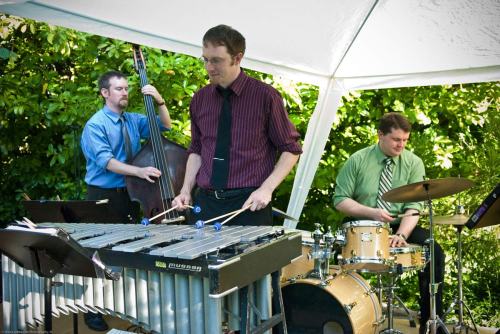
After the joyous conclusion to the ceremony, we set our guests loose for cocktail hour, and entertained them with live music. Our next door neighbor is a musician, and we knew from the start that we wanted his jazz trio to play at our wedding – vibraphone, bass & drums. They were so much fun, and everybody loved having live music!

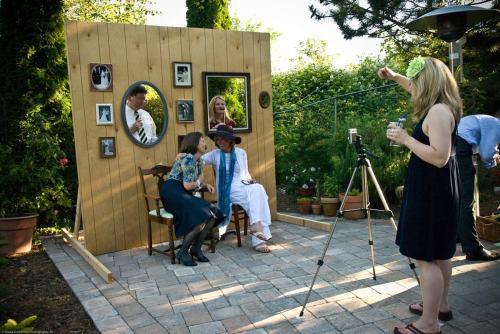
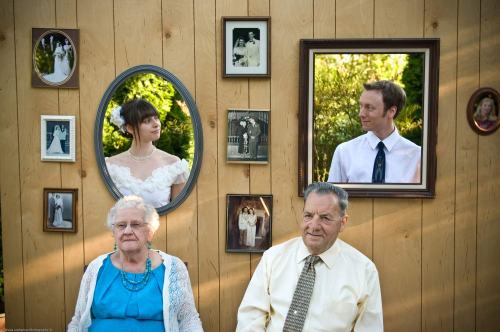
There were entertaining details strewn throughout the yard and inside the house. We built a photo booth wall especially for this day, and people loved it (we got so many great pictures)!

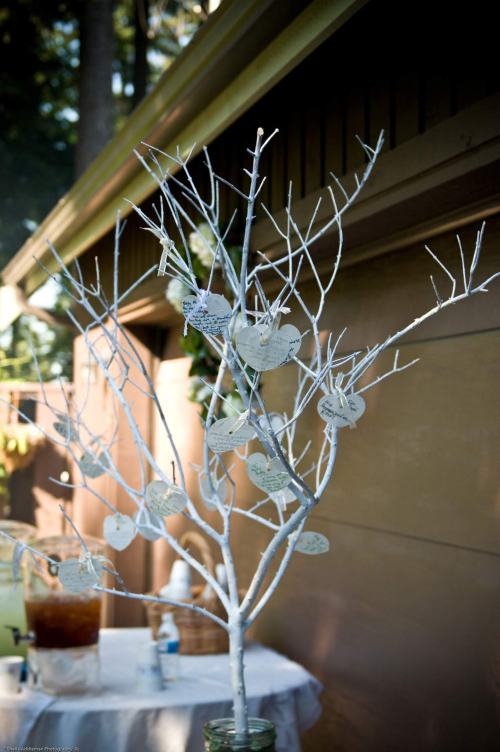
And instead of a guest book, we had a “wishing tree” for people to write notes to us on paper leaves.

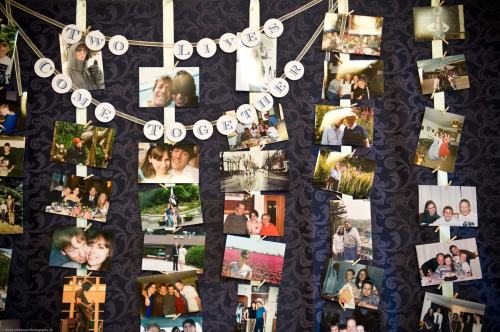
And we hung up a huge fabric panel, on which we hung ribbons clipped with over a hundred photos of M & I, from baby pictures up to just weeks before the wedding.

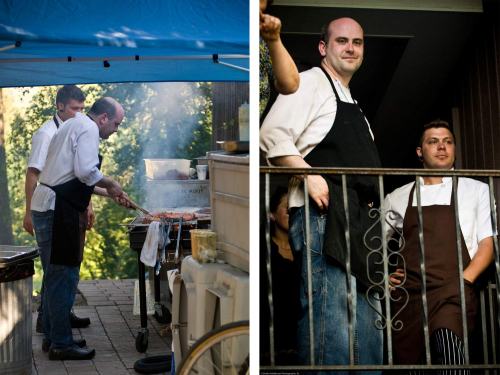
The dinner we served was just brilliant. Our very talented caterer, Drew Pritchard, is a long-time friend and current housemate, of my older brother. He’s an amazing chef and skilled banquet organizer, and again, we knew from the start that we wanted him to do our food. And he didn’t disappoint! Everyone was raving about how good the food was.

Lots of wonderful things were said during the toasts, and I almost lost it when I wanted to thank everyone for being there and how special and meaningful each and every one of our guests are to us. Luckily M jumped in before I totally broke down – we’re a good tag-team.

The cake was a work of art that my master-baker Uncle Bill created for us – a three tier cake (1 layer white w/ bavarian creme filling, and 2 layers of carrot cake w/ cream cheese filling) with blue hydrangea blooms between the layers, and airy whipped frosting with a simple dotted design. And my ceramic birdies topped the cake, of course.

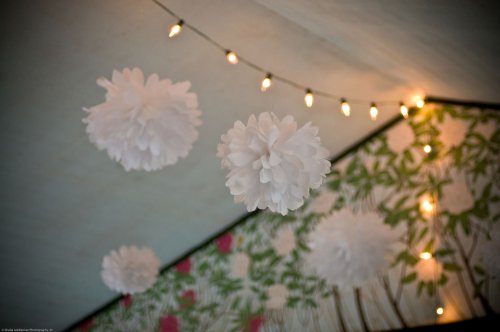
The rest of the evening was spent dancing under string lights and paper pom poms, with our IPod as DJ. Lots of people stayed late into the night. M and I left just before it was clear that the party was over 🙂

Overall, a perfect day.

More to come! I’ll go more in depth on all the details soon.

2 Comments

Filed under Crafts, DIY, Events, food, Music, paper, projects, Wedding

It’s in the mail

We are reaching a major milestone in the wedding process today – mailing out the invitations!

They are stamped, addressed, stuffed, and ready to go 🙂

M and I spent a good long while mulling over and designing the invites… and, like our Save the Date cards, we did these totally in-house, hand-made style. They relate to the StD’s but go a step further in the design, and I really hope they make a great impression when our recipients open them!

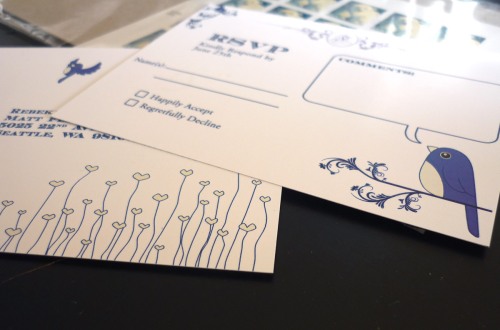
Our RSVP cards were the element holding up our mailing. We actually had these printed at a print shop, since we didn’t have the heavy-weight paper.
We decided to do a postcard RSVP, for a few reasons. To save on postage, to save on weight in our invitations, and to save paper: all good things to save, in our opinion! The RSVPs are a bit more light-hearted in design that the invitations themselves, and we left a spot for folks to write us some comments, so we hope they do!

So this is the moment of truth! No turning back now (haha), the invitations in the mail means it’s official, and we are less than 2 months from the day. I know that the next several weeks are going to fly by like none other, but I plan to do my best to keep it all in check and ignore those pesky wedding-nightmares that pop up every week or so (yes, I have had multiple wedding nightmares – the kind where you show up without your dress, or have no idea what your vows are, or you don’t recognize anyone at your own wedding, haha).

But really, I’m so grateful we have such generous friends and family who are helping us with so many things along the way. We literally couldn’t do it without you. So here’s to the final-stretch countdown 🙂

1 Comment

Filed under paper, Wedding

Market Recap

So yesterday was my first experience as a vendor at the Fremont Sunday Market. What a day!

I shared a booth with two of my lovely & talented friends, Tiffany and Stacie, so our booth had an awesome variety of items – ceramics from me, unique fashions from Tiffany, and beautiful handmade cards and journals from Stacie.

The day started early and slowly: non-member vendors (i.e. not the regulars who come every week to sell) have to sign up at the Fremont Market desk to get in line for a spot at 7 AM (ug!). After arriving at about 7:15 and getting my name on the list, Tiffany arrived, and we headed over to Peet’s for coffee. We didn’t need to be back at the desk until 8:30 to get our assignment (members get priority before non-members), so we just hung out for a while and Stacie met up with us.

The whole process of getting a market booth was really easy (although I was totally antsy up until they called my name) and the folks who run the market were really friendly, but I am still so glad that Tiffany and Stacie were there with me. It’s always way more fun to do these things with other people!

So when we finally got our spot, we rushed into action! Setting up the cheap-o ten-foot canopy I bought from Rite Aid was not as embarrassing as I thought it would be (next to all these professional-looking vendors with their pop-up tents). Stacie was great and had 2 six-foot tables for us to use. By ten o’clock (when the Market officially opens) we were pretty much ready for the day!

our team at the market - ready to go!

I was really happy with how my table looked, especially since I spent a good chunk of time Saturday figuring things out. Everything looked very cheerful and inviting!

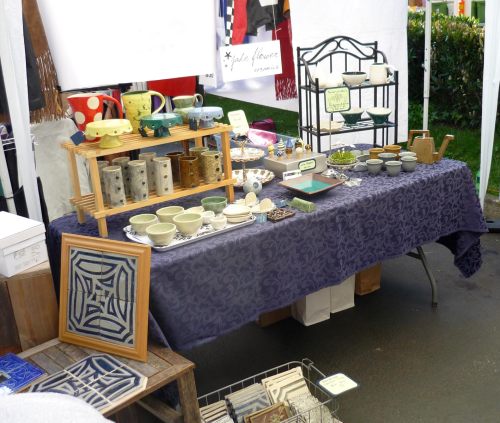
jadeflower ceramics display

jadeflower ceramics display

And like I said yesterday, I looked at this day as a Spring Cleaning attempt – to clear out stuff that I’ve had in storage for a while, so my display had all sorts of odds n’ ends!

The day seemed to go by so quickly. It was lots of fun to spend the day hanging out with Stacie, Tiffany and M (who came for the whole day, the sweetie!), and we couldn’t have wished for better weather! The sky was perfectly blue and clear, it was warm and sunny, and lots of people came out to the Market to enjoy it.

sunshine at the fremont market

I ended up selling quite a few things, which was certainly nice (and I made back my booth fee and then some). But I definitely didn’t sell as much as I wanted to (ain’t that always the way, though?), especially since I wanted to clear out all this stuff and it was all priced so LOW! haha oh well!
We made a few friends with some vendors around us, and everyone we encountered was really nice. All in all, it was a most satisfying day 🙂

I have visions of becoming a regular member of the market, but for now those ideas will have to wait. I’m just not ready to do this on my own yet. But I would certainly do this kind of shared booth again. It was certainly fun enough!

Leave a comment

Filed under Crafts, Events, Jadeflower Ceramics, paper

Another Wedding Project – Paper Cones

As a wedding guest, one of my favorite parts of the festivities is when we get to shower the newly-weds with something – rice, rose petals, dried lavender, confetti, whatever! There is something so celebratory in the act of tossing a big fluttery cloud of WOO HOO! I don’t know, it’s just fun, and as a guest I feel like I am even more connected to wishing the couple happiness and prosperity through this ritual.

M & I aren’t planning a big exit from the party at the end of the night (heck, I want to stay till I’m ready to drop!); lots of couples have the big send-off exit with the confetti tossing (or sparklers or whatever!) after the reception. But that doesn’t make sense for us. Rather, we will have our big “exit” when we head back down the aisle after we’re pronounced husband & wife, and our guests can toss stuff at us then. I was hugely inspired by this post from Style Me Pretty back in January.

This DIY bride made paper cones to put confetti in for her guests. I love the double-sided paper, and the simplicity of the idea. Plus, the little sticker informs the guests on what to do and when.
Our variation on this idea will be to hang the cones (with ribbon) on the backs of the chairs at the ceremony rather than hand them out to guests.

M really liked the idea, especially since it involved cool paper (he’s such a graphic designer…he drools over fonts and papers!). So we hit up a few paper stores until we found some really cool designer paper at a cute little store in Wallingford called Paper Delights. We wanted to find a double-sided patterned paper in our color palette, and though we were hoping to find some navy blue & white damask paper (no luck), the green and light turquoise pattern we bought is just beautiful.

So here’s how you do this…

The paper we got was 24″x36″ so we could cut them into 6″ squares and get 24 cones per sheet (not too shabby). A paper-cutter made this waaaaay easier than cutting by hand.

After making a stack of paper squares, I popped in a movie and got to work taping. I quickly realized that forming a perfect cone is not easy to do freehand. The paper does not want to cooperate which can be very frustrating. My solution? I made a kind of template out of stiffer cardstock, so then all I would have to do is wrap my pretty paper around the template cone to get the right shape! This definitely made the whole process easier.

So with template cone in hand, I would wrap a paper square, grab a little piece of double-sided tape, and tape the edge down near the point. Then with a larger strip of tape, I’d tape the rest of the edge down to finish it off.

I alternated which side of the paper faced outward so there would be a bit of variety.

We still need to design stickers to put on the front of the cones, and also punch a hole in each one to string with ribbon. But the tedious part of taping the cones is done 🙂

I envision these hanging from the chairs at our ceremony, filled with rose petals, ready to be tossed joyously into the air as M and I walk back down the aisle ^_^
Yes, it’s the little details that make me smile.

8 Comments

Filed under Crafts, DIY, Inspiration, paper, tutorial, Wedding

Totally Custom DIY Save-The-Dates

It’s official! Our Save-the-Date cards have been posted. This is the first real wedding “deadline” on our way to the big day. And I think we met this hurdle quite well! We wanted to send them out by the middle of January, and by gosh, we have! (Well, to be honest, we have a few stragglers that still need addresses, but who’s counting?)

Because M is the official graphic designer of the house, he was in charge of the design (with plenty of me nagging him about it…). The first step was figuring out a layout/paper-design. We found inspiration from these examples:

and:

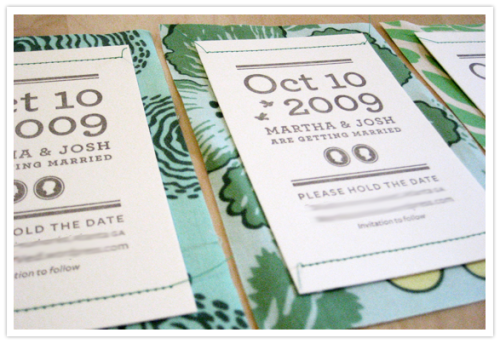
We loved the crisp lines and use of visual layering in the top photo, and I loved the sewn detail and charm of the bottom picture. (top photo from StyleMePretty, bottom photo from 100LayerCake)

We wanted to avoid glue (which is messy and tedious), and we wanted to have multiple layers of paper in our colors. We did lots of brainstorming, tried out a few ideas, and M designed the beautiful text and a central monogram.

Rather than just show you the finished product right-out, I’m going to take you through the step-by-step (which we did about 70 times…haha) But you can scroll to the bottom if you want to cheat 🙂

Supplies

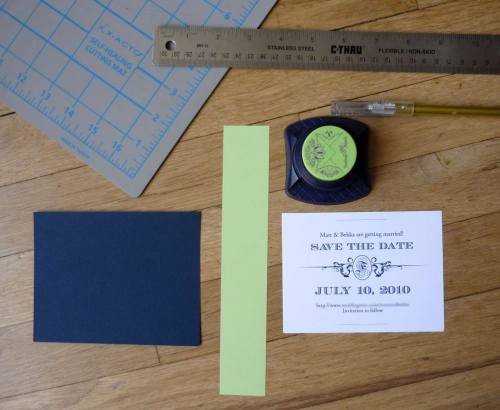
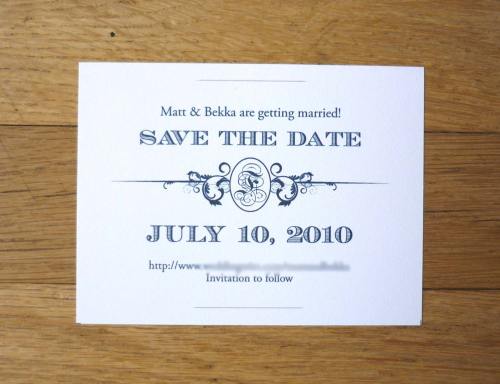
Supplies: Navy blue cardstock cut to 4.25″x5.5″, white stipple paper with text cut to 4″x5.25″, green 2.5″ paper strips, Fiskars corner punch, ruler, x-acto knife, cutting surface (and later, sewing machine and green thread)

slits for the green paper

We decided to thread a strip of green paper around the blue cardstock, and through the white paper. So we needed slits in the white paper–centered and cut to just bigger than the paper strips themselves.

M's design in raw form

The beautiful text and monogram that M designed.

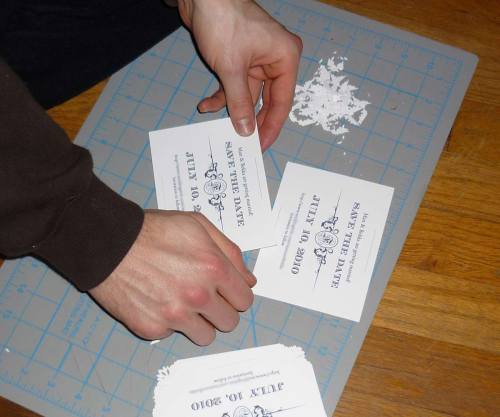
Punch those corners

A corner punch tool can make dramatic changes to a simple piece of paper.

M got in on the punching too

Punching out 280 corners turned out to be hard on the hands! 😛

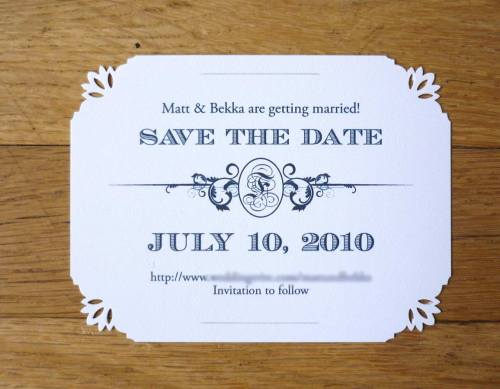
Top layer with corners punched out

What a difference the decorative corners make!

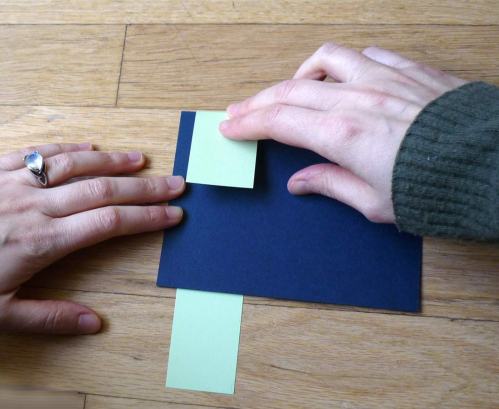
Folding green strip over blue cardstock

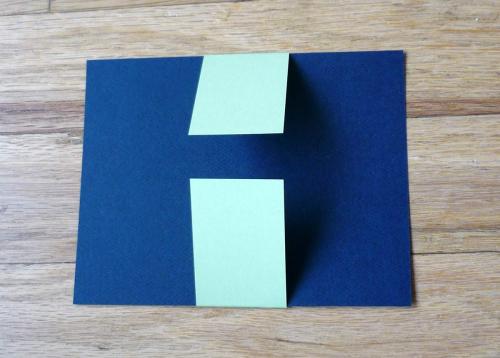
Next, the background must be assembled. The green paper strip gets folded over the cardstock for a snug fit.

Folded and ready

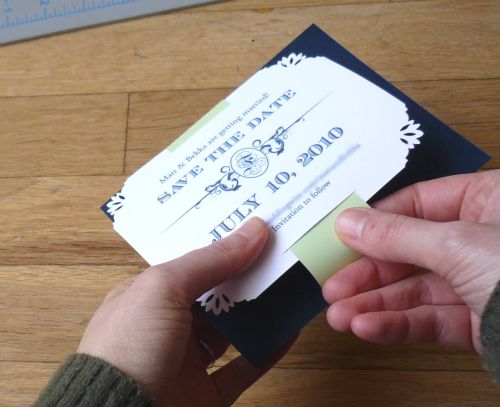
Threading the paper strip through the pre-cut slits

Next, the green strip is threaded into the slits of the white top piece, through the top, and the bottom.

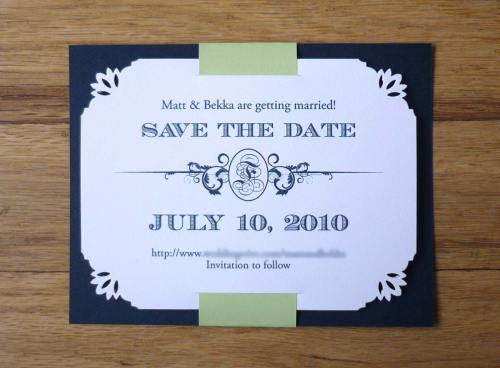
Assembled!

We could easily have used glue or double-sided tape to secure the paper components. It looks pretty good just as it is! But we decided to take it a step further…

To the sewing machine!

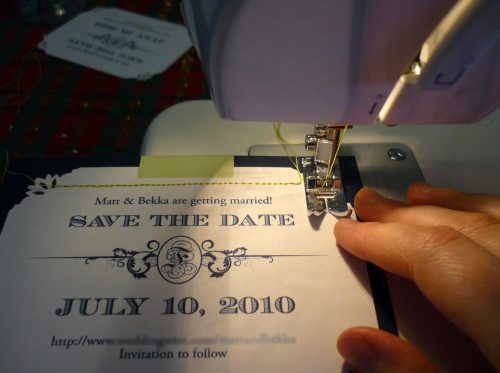
Sewing took the most attention to detail. Making sure the card pieces were centered, I sewed lines parallel to the card edges. When I got to a corner, I would stop, lift up the foot, and pull about 4 inches of slack thread out (you’ll see why), then rotate to the next side.

all sides sewn

I left plenty of slack thread at the corners, because we wanted 4 separate lines of stitching (not joined together) for a really clean look on the front.

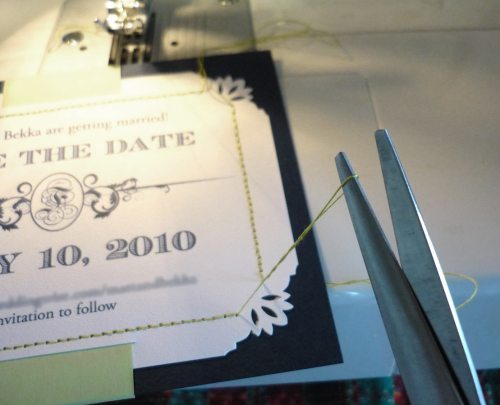
snip those thread loops

So, to clean up the front, I snipped the thread loops at the corners, then flipped over the card to bring all the threads to the back. To do this, you just give a little tug on the back-side threads, which makes a little loop appear. By pulling on the loop, the front thread gets pulled to the back.

all threads on back-side

All that is left is tying off the threads on the back and snipping off the excess!

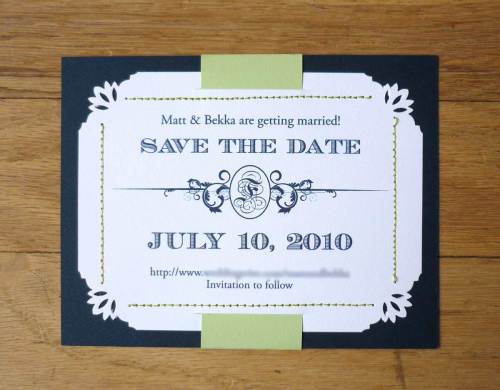
Our Save the Date card

While these cards took plenty of time to make, M and I had fun working together on them through the whole process, and we hope the recipients like them as much as we do!

Most importantly, I think the cards really  feel like us. And it’s the first clue (we hope) to our guests what to expect in July.

2 Comments

Filed under Crafts, DIY, paper, projects, tutorial, Wedding