Tag Archives: summer

New Summer Pricing in my Etsy Shop!

Hey there! Hope the beginning of summer is treating you well!

I’ve been enjoying the Pacific Northwest’s excellent early summer – super long days, and weather in the 70s. Little Ethan is keeping me busy playing outside, but I’m also getting as much studio work done as possible. And to celebrate summer, I’m lowering my prices on a whole bunch of my items!

Summer pricing banner

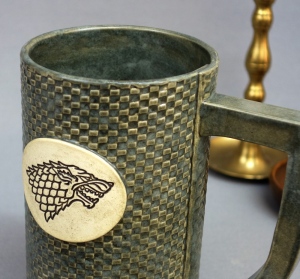
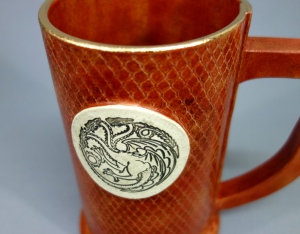
This includes many of my Doctor Who Tardis pieces and my new Game of Thrones inspired mugs and steins!

GoT Stark SteinGoT Lannister mugGoT Targaryen Stein

I’ve also done some spring cleaning in my studio, and pulled out a few older items and put them WAY WAY on sale. Time to make some room for new items! So I hope you’ll click over to my shop (https://www.etsy.com/shop/jadeflower) to check out what’s new!

Leave a comment

Filed under Uncategorized

Cherry custard breakfast Tart (gluten free)

It’s been quite a while since I’ve posted a recipe here on the blog! And over a month since I’ve posted at all! The last couple months have been a whirlwind of work, a new business venture by my mother, and lots of pre-wedding events for two of my closest friends.

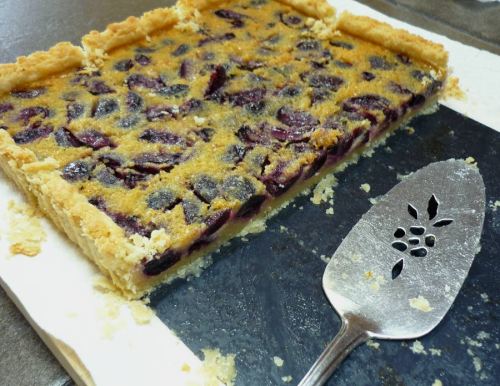
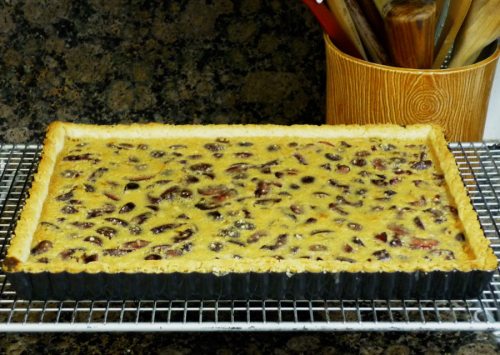
Fresh Cherry Custard Tart

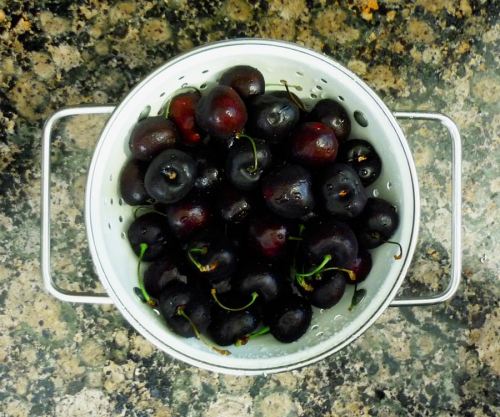
But here I’d like to check in briefly, and share a recipe that may make the rounds into your summer brunch rotation. I searched out a breakfast tart recipe in order to utilize a few ingredients I had on hand that I wanted to use up – my first batch of fresh summer cherries, ground almond meal that has been living in my fridge for the past 2 months, and leftover ricotta cheese.

Sweet fresh cherries

I made a huge batch of almond “flour” in April in the attempts of baking homemade French macarons. After two failed attempts (wop wop), I decided to leave it to the professionals. But I still had a good amount of almond meal left over. (Almond meal is simple to make at home, if you have a food processor. You can also buy it at most grocery stores these days – Bob’s Red Mill is a good brand to try. But making your own is cheaper!)

I made this tart to bring for a Father’s Day brunch at my parents’ house on Sunday. I wanted to be sure it wasn’t too sweet (since this was a breakfast dish), I wanted it to be gluten-free and nearly sugar-free to appease my mom, but still taste great for my dad. This would also be completely suitable as a dessert dish for a fresh summer meal. You can certainly make this the night before, for a breakfast or brunch.

Cherry Custard Breakfast Tart
adapted from Cannelle et Vanille
Total time ~about 2 hours

Almond Crust:
2/3 cup brown rice flour (I used Bob’s Red Mill brand)
1/2 cup almond flour
3 Tb cornstarch
1 Tb sugar
1/4 tsp sea salt
6 Tb butter – diced into 1/2″ cubes, reserve in freezer until needed
1 egg yolk
2-4 Tb ice water

In a food processor, combine the dry ingredients, pulse to 3-4 times to mix. Add the butter, pulse about 10 times, until butter is incorporated to about pea-sized (do not over-process). In a small bowl, whisk together the egg yolk and 2 Tb of ice water. Add to the flour mixture, pulse several times to incorporate. Add up to 2 additional Tb of ice water, pulsing until dough begins to hold together. Turn out dough onto plastic wrap, briefly knead into a ball. Flatten into a 1″-thick disk or rectangle (depending on the pan you’ll be using), wrap up and refrigerate for 1 hour.

When ready to roll out the dough, roll between two sheets of plastic wrap, lifting up & replacing the wrap after each roll to give the dough the freedom to move. (Using plastic wrap lets you see the dough, but makes clean-up easy and lets you pick up the fragile dough without it sticking to your work surface or tearing it with your fingers.)

Place your dough in your tart pan & trim excess. Refrigerate until filling is ready.

Cherry/Custard Filling:
1 pound fresh cherries, pitted & quartered
3 Tb unsalted butter
1 vanilla bean, split & seeds scraped
1/4 cup almond flour
2 Tb cornstarch
2 eggs
1/4 cup agave syrup
1/4 cup ricotta cheese

Preheat oven to 400F (200C).
In a small saucepan, brown your butter (for a great how-to on browning butter, click here). To the browned butter, add your vanilla bean and seeds. Let the vanilla steep for about 10 minutes. Remove bean.
In a small bowl, whisk together almond flour and cornstarch. In medium bowl, whisk together eggs, agave, ricotta cheese, and butter mixture.

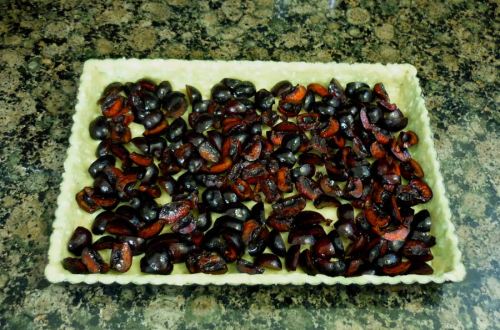
Layer cherries on tart dough

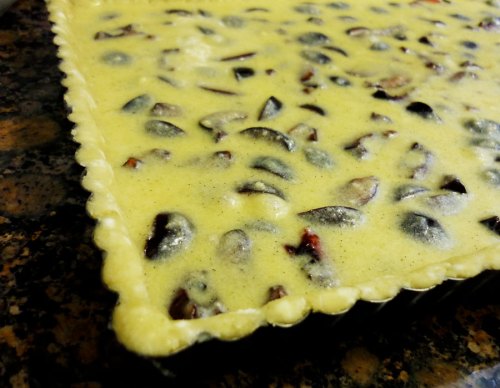
Arrange your cut-up cherries on your tart dough (give the pan a few gentle shakes to get them evenly distributed). Pour the custard mixture over your cherries – tap the pan a few times to evenly distribute the custard.

Look at those gorgeous vanilla seeds!

Bake for 20-25 minutes, or until beginning to brown on top. Let the tart cool completely before serving. Enjoy!

Let tart cool completely before serving

1 Comment

Filed under food, Recipes

Made in the Shade – a unique planter pot Umbrella Stand

It’s been a busy month (ahem, yeah, my last post was over a month ago), but M and I have finally been getting this house to feel like a home. One of the projects I really wanted to tackle was for our outdoor space  was a stand for my patio umbrella. Here’s how I did it!
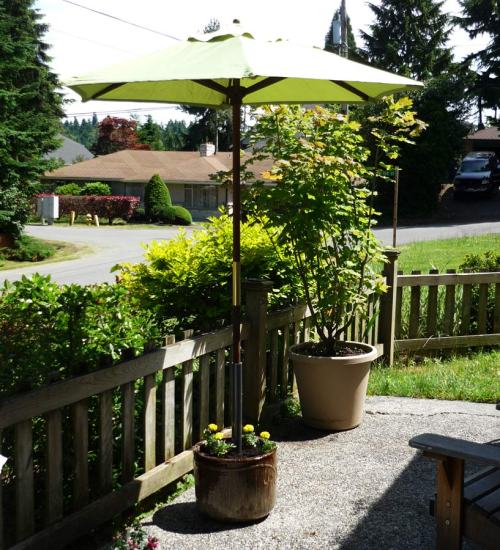
DIY Planter Pot Umbrella Stand

I’ve owned this super cute, small canvas patio umbrella for years now, but it’s been in storage for a good 3 years or so because our last apartment didn’t have a space for it. Now that we have a big outdoor area to play with, I really wanted to bust it out!
The problem was, after scouting around to find a nice umbrella stand, I discovered that there are basically two camps: super ugly and cheap OR classy and way too expensive. The other idea was to find a thrifted patio table – the kind with the hole in the middle – but it turned out to be a much more difficult search than expected.

Finally I decided to make my own solution! An umbrella stand that would be unique, changeable, and inexpensive! Here’s what I did:
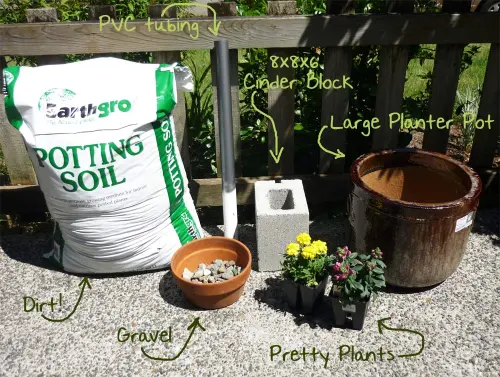
DIY Umbrella Stand Materials

Materials:
*Large Planter Pot – proportional to the size of umbrella
*Small Cinder Block (8x8x6)
*Length of PVC tubing – wide enough for umbrella handle
*Gravel
*Dirt
*Plants
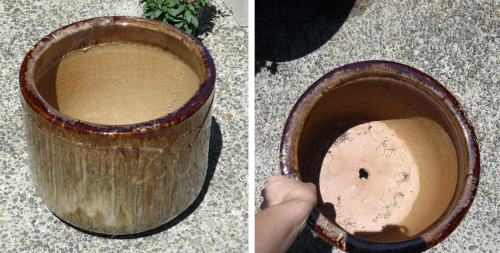
Ceramic planter with drainage hole

Be sure your pot is a good size. Since it will be outside (and have plants that need water), be sure there is a drainage hole in the bottom!
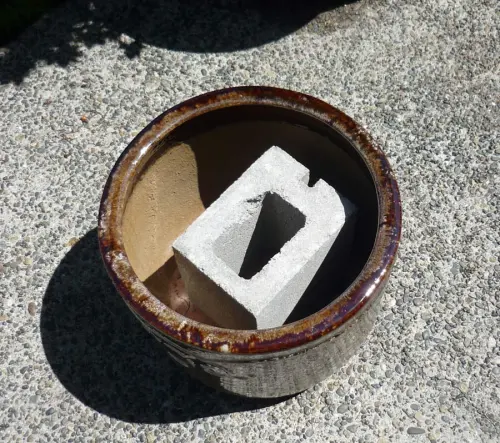
Planter with cinder block

Place your cinder block in the center of your pot. Be sure it’s in a good position to put your PVC tube right over the drainage hole.
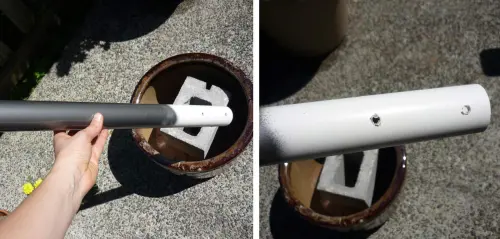
PVC tubing - Painted & Holes Drilled

I spray painted the top portion of my tubing a dark gray color, so the white PVC isn’t so noticeable. I also used a drill bit and my hand-held drill to put a few drainage holes in the bottom of the tube.
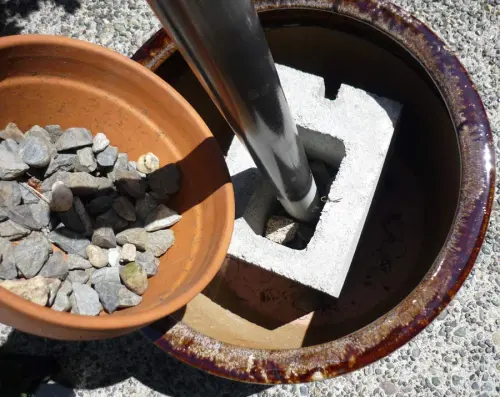
PVC & Gravel

With the PVC tube centered over the drainage hole, fill in the cinder block space with gravel until the tube is securely lodged in place.
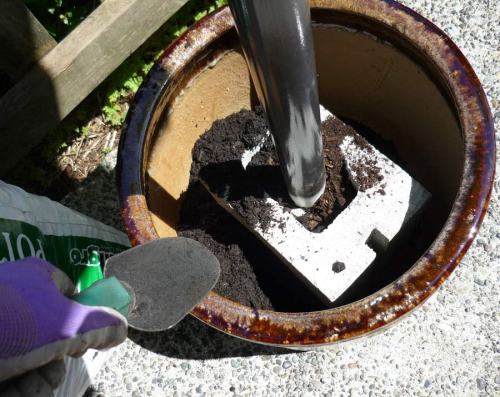
Adding dirt to the planter

At this point, make sure your planter umbrella stand is located where you want it – it’s about to get really heavy! Next step is adding your potting soil.
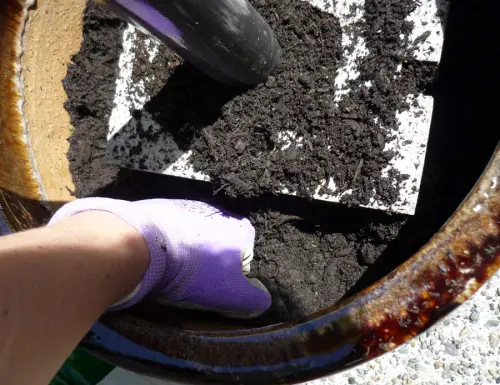
pack it in there

Pack the soil in really well around the cinder block – you don’t want it to move!
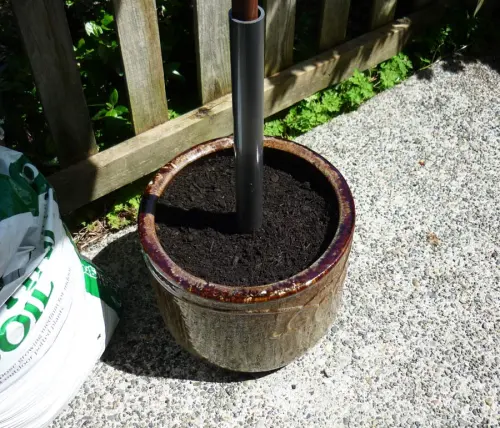
Planter filled with dirt!

Once you’ve got the block hidden and the planter all filled, it’s time for adding pretty things! I had a few marigolds and snap dragons, but it turned out my planter wasn’t that big, so I just did the marigolds. If I were to do this again, I’d probably choose a trailing flower, like petunias or something, but I do think the happy yellow marigolds are cute. 🙂

umbrella stand planter with flowers

So there you have it! Simple yet effective!
Those flowers will fill in a bit, but even sparse as they are, I really like how this project turned out! And what’s great about it is, since I didn’t use cement or something permanent to affix the PVC tubing, if I get tired of this arrangement, I can disassemble the whole thing and I still have a great ceramic pot to use!

And the break down for price is pretty great:
*Ceramic Pot: $16
*Potting Soil (way more than needed for this project, btw): $5
*PVC tube: $1.25
*Spray paint: free (already had it)
*Gravel: free (gathered from the back alley)
*Cinder block: $.95
*Marigolds: $.95
TOTAL: $24.15

So yeah, good luck finding a nice free-standing umbrella stand at the store for under $25!
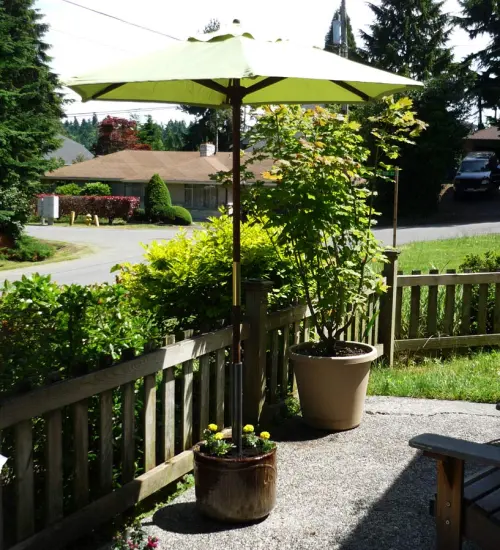
Outdoor living, here we come!

And now with the summer weather finally arriving in Seattle (we hope!), we’re one step closer to some awesome outdoor living!

9 Comments

Filed under Crafts, DIY, Plants, projects, tutorial