Tag Archives: recipe

Experimentation with Fermentation! Part 2

My maiden name is Guenther, and my dad’s side of the family has a pretty German heritage, but somehow or other I don’t think I ever tasted sauerkraut until I was an adult. Most likely my mom, who is all Irish, didn’t fancy the stuff. So it just wasn’t something I ever ate as a kid, and I must have therefore figured it was a “yucky” food, and never sought it out. Until one day I was visiting some relatives on my own after college, and they had sauerkraut as a side dish. I enjoyed it from the first tentative bite! It was like pickles, sour and salty and a bit crunchy. I started buying it at the store from then on – not religiously, but when I remembered it as a flavorful condiment.

After learning more about fermented foods, recently, I have decided that homemade sauerkraut is the next project!
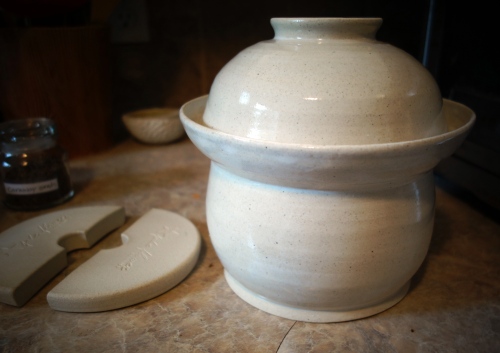
And not only that, but I decided I first needed to make my own ceramic crock to ferment it in, being that I am a potter, after all.
dsc04799w

My first attempt at a handmade fermentation crock

Now that I had a crock to ferment in, here’s the process I followed for homemade sauerkraut!
dsc04791w

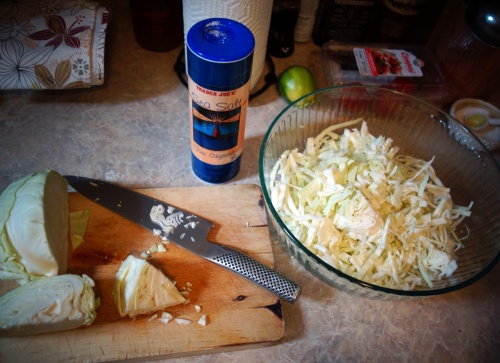
Chopped Cabbage and Salt

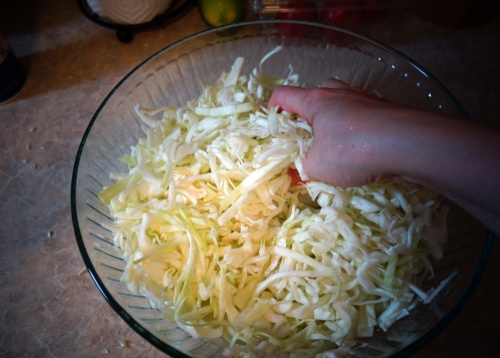
I filled a huge bowl with chopped cabbage. Just one head, about 2 lbs. One head of cabbage was more volume than I expected! But then I added sea salt, probably about 3 teaspoons (I didn’t measure), and started squeezing the buhjeezus out of it.
dsc04793w

Massaging the salted cabbage

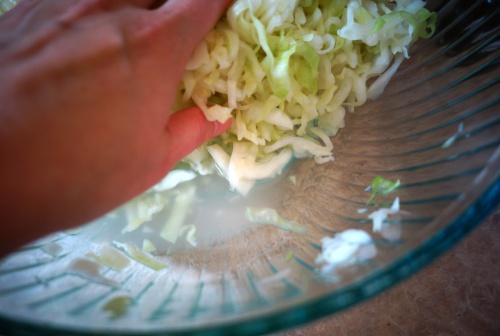
This got the cabbage all coated with the salt, and already it started drawing the water out. After walking away, and then coming back to repeat the massaging process every 10 minutes or so, the cabbage really started releasing its juices.
dsc04800w

Cabbage juices pooling in the bowl

After an hour of this, I felt the cabbage was sufficiently reduced in volume and wilted enough to start packing into the crock. I tossed in a teaspoon of caraway seeds (because Michael Pollan added some to his in Cooked), and then into the crock it went, handful by handful.
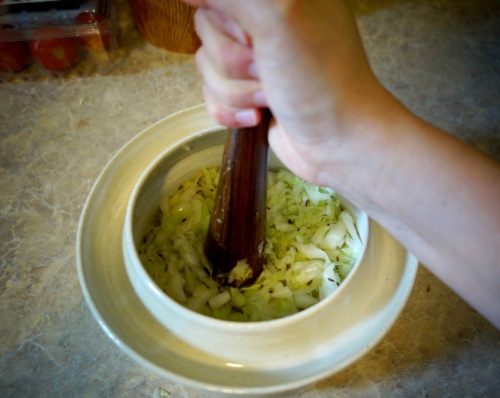
dsc04801w

Pounding down the cabbage

I used a cocktail muddler to really pound down the cabbage. This forces out the air, packing it down, and it gets the water to continue squeezing out of the cabbage. The cabbage juice (or brine) needs to be at a level above the solid cabbage; this protects the kraut from exposure to air, which can cause it to mold (bad).
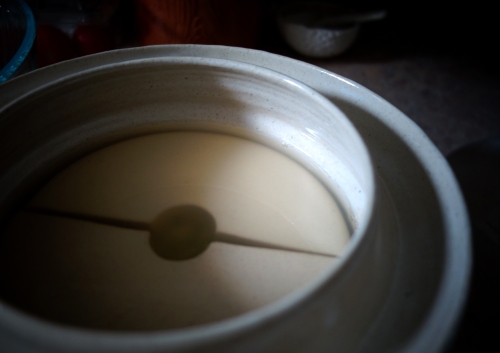
dsc04804w

Weights to keep the kraut submerged below the brine level

Once I felt I’d pounded enough, and the cabbage was sufficiently juicy, I topped them off with two half circle ceramic weights I’d also made when I made the crock. These will keep the kraut from floating to the top and getting moldy. The bacteria that transform the cabbage in to sauerkraut prefer an oxygen-free environment, so that’s the environment I intended to create.
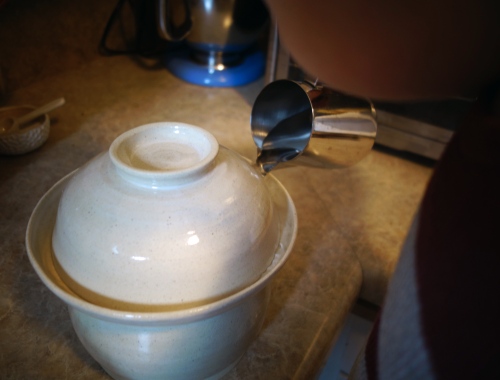
dsc04805w

Adding water to the moat creates an airlock

The photo above shows my little helper Ethan, pouring the water into the reservoir around the crock lid. The water will let CO2 out (it’ll “burp” to release pressure), but won’t allow any air to go in.

dsc04806w

My kitchen helper

Look how proud he is, helping Mama. Nevermind that he spilled most of the water on the counter, haha. By the way, how is it possible that this kid is two-and-three-quarters already?? Obligatory observation on how time flies.
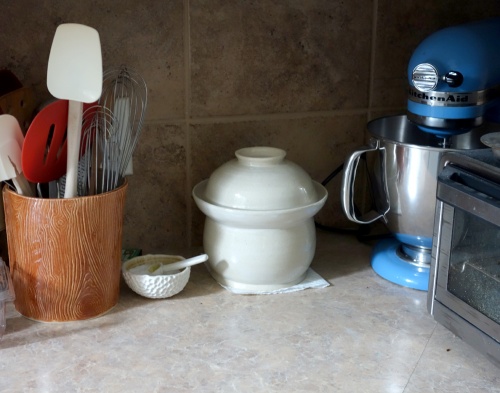
dsc04820w

And now we wait…

So that’s it! Now my pretty little crock will live on the kitchen counter for a few weeks, and hopefully it will produce a yummy, probiotic sauerkraut!

And out in my studio I’m working on improving my design. Swing over to my Jadeflower Ceramics Etsy Site – I’ll have crocks like this (better, even!) for sale in my Etsy shop.

Here’s to my continuing fermentation adventure! Bye for now!


Leave a comment

Filed under DIY, Fermentation, food, Recipes, tutorial, Uncategorized

Cold weather recipe – Fish Chowder

When we were little my mom used to make some amazing fish chowder, and it’s still a tradition in my family to do fish (or sometimes clam) chowder for dinner on Christmas Eve. She’s a New England gal at heart.
I hadn’t ever tried to attempt making fish chowder myself, until this week when I realized I had a nice frozen fillet of cod in my freezer that was just waiting to be made into a creamy chunky soup.

New England Fish Chowder

I did a little sleuthing on the web and through some cookbooks to get the basic gist of what goes into chowder, and found I had to make a few changes due to the ingredients I had on hand, and here’s what I came up with:

Rebekka’s Take on Fish Chowder

1 cup chopped shallots (I found I didn’t have any regular onions! But hey, shallots are an upgrade, right?)
2 tbsp olive oil
1/4 cup dry white wine (I had a Chardonnay on hand)
3 cups potatoes, peeled & cut into 3/4″ cubes (that’s like 3 medium russets)
2 cups dashi fish stock – ie Bonito fish flakes steeped in water (Don’t know what dashi is? I’ll explain in a sec)
1 tsp dried thyme (or more if it’s fresh…I didn’t have fresh)
2 tsp sea salt
pepper to taste
bay leaf
1/2 lb fillet of cod, or other sturdy white fish, cut into 3/4″ cubes
1.5 cups heavy cream (or 1 cup cream, 1/2 cup milk, which is what I had)
2 tbsp flour (optional)

OK, so with most good soups, you start with onions. I found I didn’t have onions, but for some reason I had a whole bunch of shallots, so I chopped those up and put them in my pot with 2 tbsp of olive oil and heated them over medium heat until starting to turn translucent (about 5-8 minutes). Then I added the white wine to the shallots, which I reduced to about half volume.

chopped shallots

Next, you’re supposed to have clam juice or strong fish stock, or even chicken stock I guess would work. But I didn’t have any of this. then I remembered I had a bag of Bonito Flakes in my pantry from the last time I went to the Asian food market. You use these paper thin flakes of dried fish to make dashi, a broth that is used in lots of traditional Japanese cuisine (Great background reading on dashi can be found at JustHungry!) So I thought, why not just make my own kind of fish stock with the bonito flakes? It’s fishy enough! So I put another small pan on the stove, added 2 cups of water and a handful of fish flakes, brought the water to a boil, and then removed from the heat. I let the pan sit for about 10 minutes and then I strained out the flakes and had my broth! That gets added to the shallots and reduced wine.
Then I tossed in the cubed potatoes, the thyme, bay leaf, salt and pepper. Also a pinch of paprika for good measure. Then I let the potatoes simmer for about 15-20 minutes, until just starting to feel done, but not too soft.

shallots, potatoes, herbs, and dashi!

At the end comes the fish! Into the pot! And the cream/milk goes in too. At this point you need to reduce the heat so you don’t curdle the dairy. Basically, keep stirring and keeping an eye on the chowder until it’s steamy, but not boiling. Once the fish is cooked through, it’s ready to serve!

fish chowder, almost done

Well, one minor tweak…I know that real New England fish chowder is not the thick creamy stuff you get at, say Ivar’s, in a sourdough bread bowl. This kind of chowder isn’t meant to have any thickeners added other than the natural starch in the potatoes and the cream. That said, I did want a little more body to the broth (and I knew M would too), so I cheated. If you want your soup a bit thicker, you can siphon off a cup of the broth and add 1-2 tablespoons (or more!) of all-purpose flour and whisk until smooth; then pour your flour-thickened mixture back into the main pot of chowder and stir to incorporate.

Enjoy with a piece of crusty bread, and maybe a healthy salad to balance out all that cream 😉

Leave a comment

Filed under Recipes

Blackberry Limoncello Sorbet – a homemade indulgence

I’m still on my blackberry kick (since acquiring a huge back of frozen berries from my parents), and M and I discovered a beautiful way to enjoy them. Homemade Blackberry Sorbet, yummmm 🙂

blackberry limoncello sorbet

M & I just bought ourselves a new toy, a KitchenAide Ice Cream Maker! It’s an attachment for my stand mixer (which I adore and use all the time). We’ve only just begun to test it out, but M loves ice cream, so I’m sure we will get plenty of use out of it in time.

Fruit sorbets are a much healthier (not to mention, way cheaper) alternative to homemade ice cream made with heavy cream and lots of sugary extras. I found this recipe for a delicious sorbet on the Chocolate Gourmand, and the picture instructions are great for a newbie like me.

This recipe is so great for a few reasons – first, since you don’t heat the berries (you just puree them in a blender) you don’t lose any of those wonderful nutrients that berries are so lauded for; second, the addition of the liqueur really does keep the sorbet from becoming rock-hard in the freezer (which is usually one of the drawbacks of homemade ice cream treats); and lastly, it’s simply delicious (not to mention, gorgeous)!!

I only made a couple of changes when I made this sorbet, due to ingredients I had on hand – I upped the limoncello to 3 tablespoons, and since I didn’t have Chambord I used 1 tablespoon of cherry brandy. Also, since I cut out white sugar whenever I can, I subbed 1/2 cup of Agave syrup for the 3/4 cup sugar, and it worked out beautifully. 🙂

blackberry limoncello sorbet on a sunny porch - perfect

So here’s to enjoying summer’s bounty and the sunny crisp days of fall before the winter totally takes over! Cheers.

Leave a comment

Filed under food, Recipes

Blackberry Cream-Cheese-Filled Muffins

I’ve been a very remiss blogger, and I do apologize! You know sometimes you just get into those ruts where you don’t think you have anything interesting to say.
Well, I’m going to try to break out of that mentality!

October First already! I don’t know about you, but I love the fall. Autumn is one of those seasons that I think you hate as a kid, but grow to adore as an adult. I love the crispness in the air, and the changing leaves, and all the bounty of the harvest. Thoughts turn indoors as the days get shorter.

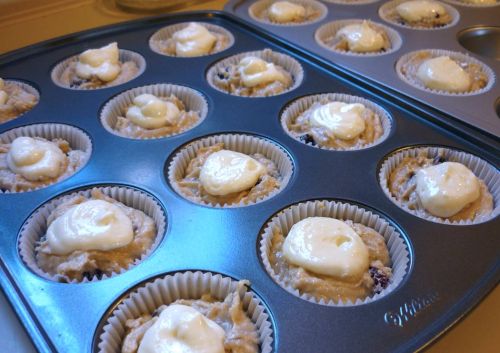
Blackberry Cream Cheese Filled muffins
One bit of bounty that has carried over from summer is the stash of blackberries in my freezer. My dad is notorious for picking (and hoarding) loads of blackberries that grow wild all over the place out here. Last time I was visiting home, my mom told me to take some with me – I discovered at least a dozen 1-gallon bags of frozen berries in their freezer! Yes please, I’ll take some.

I combined a couple of recipes to create these yummy muffins. They are perfect for breakfast, snack, or after a meal (any excuse works for me!)
Blackberry muffin batter adapted from Simply Recipes, and Cream Cheese Filling adapted from The Delicious Life.

Muffin Batter:

  • 2 1/2 cups flour
  • 1 Tbsp baking powder
  • 1/2 tsp baking soda
  • 1/2 tsp salt
  • 1/2 tesp cinnamon
  • 2 eggs
  • 1 cup sour cream
  • 1 teaspoon milk (or soy milk, etc)
  • 3/4 cup agave nectar
  • 1/2 cup vegetable oil
  • 1 teaspoon vanilla
  • 2 cups blackberries (slightly thawed if frozen)

Preheat oven to 400 degrees F. Grease muffin tins, or use cupcake liners (yields about 18 muffins).
In a large bowl, combine all dry ingredients. In a separate bowl, whisk eggs, sour cream, milk, agave, oil and vanilla. Add blackberries, and dry ingredients, combine with swift, broad strokes – do not over mix!
Fill each muffin cup 3/4 full, and make an indentation in the center of each (for your cream cheese filling!)

Cream Cheese Filling:

  • 8 oz cream cheese or neufchatel cheese (one block, softened)
  • 1 teaspoon vanilla
  • 1 egg yolk
  • 1/2 cup agave

Beat together all the filling ingredients until smooth. You can use a spoon to fill the muffins, or use a piping bag for more control. I filled a ziplock bag with the filling, then snipped the corner off and used it like a piping bag. Fill the center of each muffin until you run out of filling.

Pop the filled muffins into the oven and bake for about 20 minutes, or until starting to brown on top. Cool in the pan for 5 minutes, then transfer to cooling rack.

It’s a little fusion between muffin and cheese cake. Gotta love it ^_^

2 Comments

Filed under food, Recipes

Salmon Patties

Growing up, my dad was the culinary wiz in the family. While my mom probably cooked the majority of our family meals, my dad was the one who cooked the ambitious menus. If dad was cooking, it meant it would be something special. One of my dad’s favorites (and mine too) was salmon patties. He’d serve them fresh from the frying pan to the plate, then smother them with a fresh cheddar cheese sauce and a mound of bright green peas.

I decided to try my hand at this beloved recipe from my childhood, since I had some leftover salmon fillets, and a craving for salmon patties. Turns out, they’re not difficult to make at all!

salmon patties with broccoli and cheese sauce

Here’s my take on how to do it:

Homemade Salmon Patties

2 cups leftover cooked salmon, shredded & bones/skin removed
1/4 cup chopped parsley
2 scallions, diced
1/4 cup fresh grated Parmesan cheese (optional)
1/8 tsp fresh ground pepper
1 1/2 cups bread crumbs
1 large egg, beaten

Get your leftover salmon finely shredded by flaking it apart with a fork.

Stir in your chopped parsley, scallions, Parmesan, pepper, and bread crumbs until well incorporated.

Stir in your beaten egg – work it in thoroughly. Once stirred in well, use your hands to really work the mixture into a nice homogeneous “dough”. Shape the salmon mixture into round patties, as large as you want, but making sure they are uniformly thick so they cook evenly.

If your patties don’t stick together well, your mixture is probably too dry. Add just a teeny bit of water at a time until the dough holds together.

Preheat your frying pan over medium heat with 1-2 tbsp of oil. When the oil is shimmering, but not smoking, gently place the patties in the pan and cook for about 2-3 minutes per side, until golden brown.

You can serve these in a variety of ways! Put on a bun and treat it like a burger. Serve with a tangy yogurt dill sauce. Hollandaise sauce goes great with these. Or my favorite – sharp cheddar sauce.
Pair these with a fresh steamed green veggie and some wild rice, and you have a beautiful meal that’s fun to make and even better to eat. Enjoy!

2 Comments

Filed under food, Recipes

Cheddar & Scallion Biscuits

One of my new favorite blogs is the fantastic Smitten Kitchen. I am constantly inspired by Deb’s recipes, humor, and foodie pictures, and every time she posts a new recipe, I just want to start cooking right away!

But alas, normally I don’t have all the needed ingredients on hand so I put her recipes on the back burner (haha) for later, by which time I’ve usually forgotten what I wanted to make.

HOWEVER, when this recipe for Blue Cheese Scallion Drop Biscuits showed up, I was all over it, with a slight modification for what I had on-hand: Sharp Cheddar.

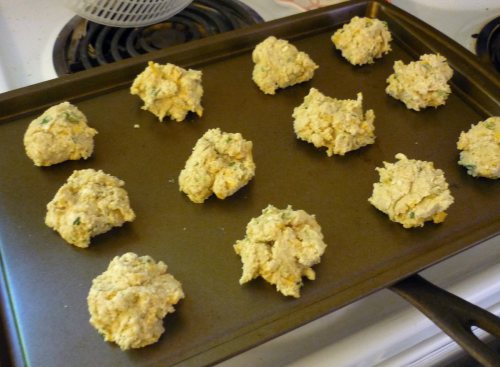
Cheddar Scallion Biscuits

Cheddar Scallion Biscuits

There’s nothing quite like a fresh baked biscuit, especially when it’s chock full of cheesy goodness and fresh spring green onions! The trick with baked goods with cheese is, when cooked the cheese loses some of its intensity – which is why when you make a cheese biscuit, you want to use a really strong cheese (since it won’t be as strong once they’re done baking). For Deb’s recipe, blue cheese would be perfect! If you’re using a milder cheese, you want to put ALOT in. If you think you’re over-doing it on the cheese, you’re not. 🙂 The same goes with the scallions – put in more than you think you should. Everything comes out milder once it’s baked!

I basically used the Smitten Kitchen recipe exactly, save for swapping the blue cheese for cheddar. I wish I had upped the amount of cheddar I used, but oh well – live and learn!
I used my food processor to cut the butter into the dry ingredients (makes it SO easy) and then transferred to a large bowl to stir in the wet ingredients.

Cheddar Scallion Biscuits before

Cheddar Scallion Biscuits - before

Cheddar Scallion Biscuits after

Cheddar Scallion Biscuits - fresh from the oven

Mmmmmm, so yummy. Perfect for breakfast, lunch and dinner! No wonder they’re gone so fast…:)

Leave a comment

Filed under food, Inspiration, Recipes

Pavlovas with rhubarb sauce

One of the tastiest things I’ve ever made with leftover egg whites…

pavolva with rhubarb sauce

I had a dilemma on my hands, because for the past few days I had a bowl of three egg whites sitting in my refrigerator. They were the leftovers from a couple other recipes I had made that only needed the yolks. So what does one do with leftover egg whites?
I know you can make egg-white omelets, but those have always grossed me out a bit. I thought maybe some sort of meringue pie would be nice…but I didn’t really want to make a whole pie.

After a bit of searching on the ol’ internets, I found this recipe for Pavlovas on one of my favorite foodie blogs, Simply Recipes. As of last night, I had never heard of a pavlova, but what sold me on it (other than using up my egg whites) was that it’s a great way to serve seasonal fruit, and I just bought a bunch of rhubarb and strawberries. 🙂 Perfect.

The recipe is very simple, and it has great instructions and pictures for you to follow. I cut the recipe in half (for 3 whites instead of 6) and I still got six large pavlova boats from it. And they look beautiful!

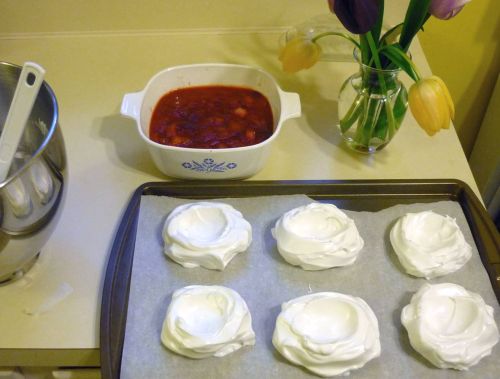
pavlova boats on parchment

To top these cute little meringue nests, I made a batch of rhubarb sauce with strawberries – a springtime favorite of mine that always makes me think of my grandma. It is such a simple dish. Here is how I make it:

Rhubarb Sauce with Strawberries

4 cups rhubarb – chopped into 1/2″ sections (about 6 good stalks)
2 cups strawberries – chopped into 1/2″ pieces
1/4 cup granulated sugar

(all these measurements are approximate – play around with amounts to find your own ideal ratio!)

Put your rhubarb into a deep pan on the stove top over medium heat. As the rhubarb heats up, it will release water and soften. Stir occasionally to get even heating and break down the larger rhubarb chunks; I like a few intact pieces of rhubarb in my sauce, but I do mash up a lot of it. Stir in the sugar (you can add more or less, depending on how tart you like your rhubarb). The sugar will cause the sauce to thicken. Add the strawberries and cook for another 1-2 minutes. Let the sauce cool. Serve on top of pavlovas, ice cream, french toast, anything! Or eat it my favorite way – straight with a spoon 🙂

pavlovas, rhubarb sauce, tulips

As for the pavlovas topped with rhubarb, I’d say they were a success. So light and fluffy! And you can’t go wrong with rhubarb 🙂
This is definitely an egg-white recipe I’ll be using again!

1 Comment

Filed under food, Recipes

Brown Rice Pudding

Last night we had a veggie stir fry for dinner, and I made a huge pot of brown rice (apparently we eat rice so rarely these days that I am no good at gauging how much to make). Anyways, we had a bunch of left over brown rice. So today I decided to figure out what to do with the leftovers.

When googling “leftover brown rice,” guess what showed up the most – you guessed it, rice pudding.

I have never made rice pudding before, but I do have a memory from elementary school that has (bizarrely) stayed with me: a girl a grade above me (who I would frequently sit with on the bus) had brought in rice pudding for some kind of cultural report/potluck. She let me try it, and I thought it was the strangest idea, but so tasty! I think I embarrassed myself because I kept asking her for more 😛

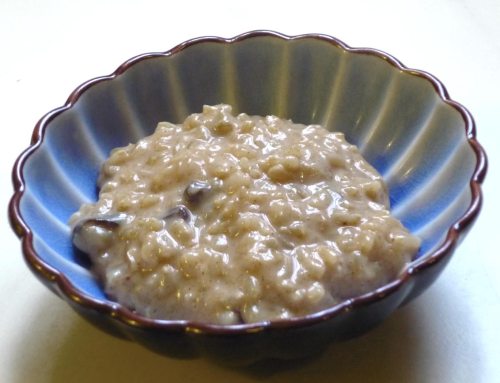
Anyhoo, here is my first attempt at rice pudding, and I think it turned out great! I modified the generic recipe I settled for online. I used agave instead of sugar, soy milk (plus a touch of half & half), and obviously brown rice instead of white.

It takes about 30-35 minutes total cooking time, and the flavor is beautiful! A not-too-sweet creamy caramelly flavor with a hint of cinnamon and spice.

Leftover Brown Rice Pudding

2 cups cooked brown rice
2 cups regular soy milk
1/2 cup half & half (I wanted to make sure the final dish was really creamy, but you could use all soy milk)
1/2 cup agave nectar
1 1/2 tsp vanilla
1/8 tsp salt
1/2 tsp cinnamon
1/2 tsp pumpkin pie spice (or 1/4 tsp cloves & 1/4 tsp nutmeg)

Combine your rice, milk, vanilla, and salt in a pot and bring to a full boil on the stove. (If all your ingredients are cold, this will take a few minutes, but be sure you’re watching once it gets close to a boil because it WILL boil over!!)

Immediately reduce your heat to a low simmer. Stir occasionally. The pudding will take about 20-25 minutes to thicken. Add in your spices. And if you want, add in raisins, walnuts pieces, what-have-you. Let it cool or eat it warm – enjoy!

So yummy, and you can feel good about it because the recipe uses whole brown rice, agave (which is low-glycemic), and soy milk (if you’re like me and have cut back on dairy).
I’m definitely adding this recipe to my “what to do with leftover rice” file 🙂

2 Comments

Filed under food, Recipes

Hearty 3 bean salad

Last night, M & I went over to our friends’ new apartment for dinner – we got to tour their new pad and also meet their adorable new pug Duke. He is such a sweetie! He’s a rescue dog, so he was a little jumpy at first with new people around, but he warmed up to us real fast. ^_^ Ahhh, makes me want a little doggie!

They made these fantastic homemade calzones for us, to which I needed to pair a salad. I decided on a cold bean salad, since I have dried beans in the cupboard, and therefore it’s really budget-friendly. And though it’s a simple recipe, it was so yummy! A crowd pleaser for sure, and very hearty for a cold wintery day.

three bean salad

I found the recipe on one of my favorite food blogs – Simply Recipes – and modified it only a little.

You can certainly use canned beans for this recipe, but I had dried beans on hand, so I soaked them overnight.

1 cup dried garbanzo beans
1 cup dried red beans
1 cup dried white beans
1/2 yellow onion – finely chopped
2 stalks celery – finely chopped
1/2 cup flat leaf parsley – chopped
1 tbsp fresh rosemary – chopped
1/4 cup olive oil
1/4 cup apple cider vinegar
1 tbsp lemon juice
Salt – to taste
Pepper- to taste

Soak beans overnight and cook according to directions. In a large bowl combine the drained beans, chopped onion, chopped celery, chopped parsley, and rosemary. In a smaller bowl, mix the dressing by whisking together the olive oil, vinegar, lemon juice, salt and pepper. Pour the mixed dressing over the bean mixture and gently fold in, until completely incorporated. Refrigerate until ready to serve. (Serves about 4-6 people)

And that’s it!
The longer the beans get to soak up the dressing, the better it will taste. Therefore – excellent for leftovers!

Granted, cooking the beans yourself adds quite a bit of time to the recipe, but it’s worth it, in my opinion. Especially when looking at the cost of canned beans to dried ones.

Leave a comment

Filed under Day to Day, Recipes