2017 Holiday Market in Kenmore!

How is it already the end of October!? I swear it was just summer! But time marches relentlessly on, and I’m deep into prepping for the holiday rush.
This year I will be a vendor at the Kenmore Holiday Market and Tree Lighting event! I participated last year, which was the first time they included a craft market to the festivities. And I know this year will be even better!

DSC05421.JPG

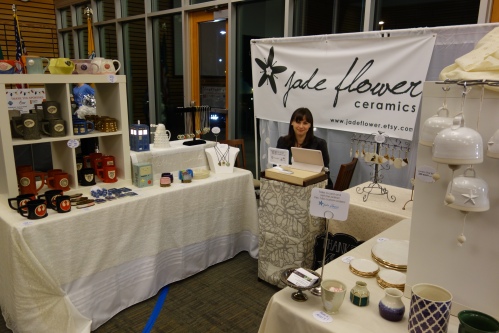
Jadeflower Ceramics at the 2016 Kenmore Holiday Market

It was so much fun designing my booth space last year. I rarely sell my ceramics in person – I’m almost exclusively an on-line seller. So getting to interact with customers face-to-face was a refreshing change! It was also so. much. work! This year, I’m planning on streamlining many of the aspects of the event that were just too strenuous or time-consuming.

DSC05428.JPG

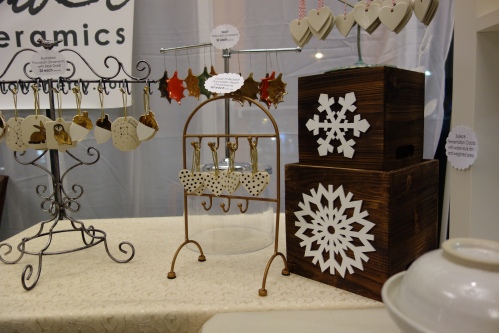
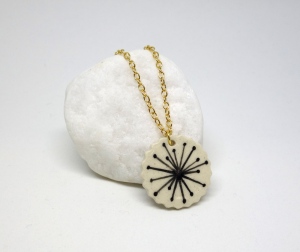
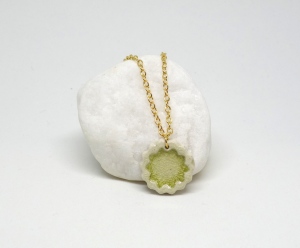
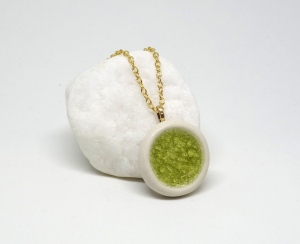
Holiday goodies like sparkly gold luster ornaments!

I’ll also focus more critically on the items I bring – there were plenty of fancy big-ticket items I lugged with me last year that did not sell. I loved seeing them displayed, but the payoff wasn’t there when considering how much time and energy I had to spend carefully packing, unpacking, and then packing them up again at the end of the show!

DSC05427.JPG

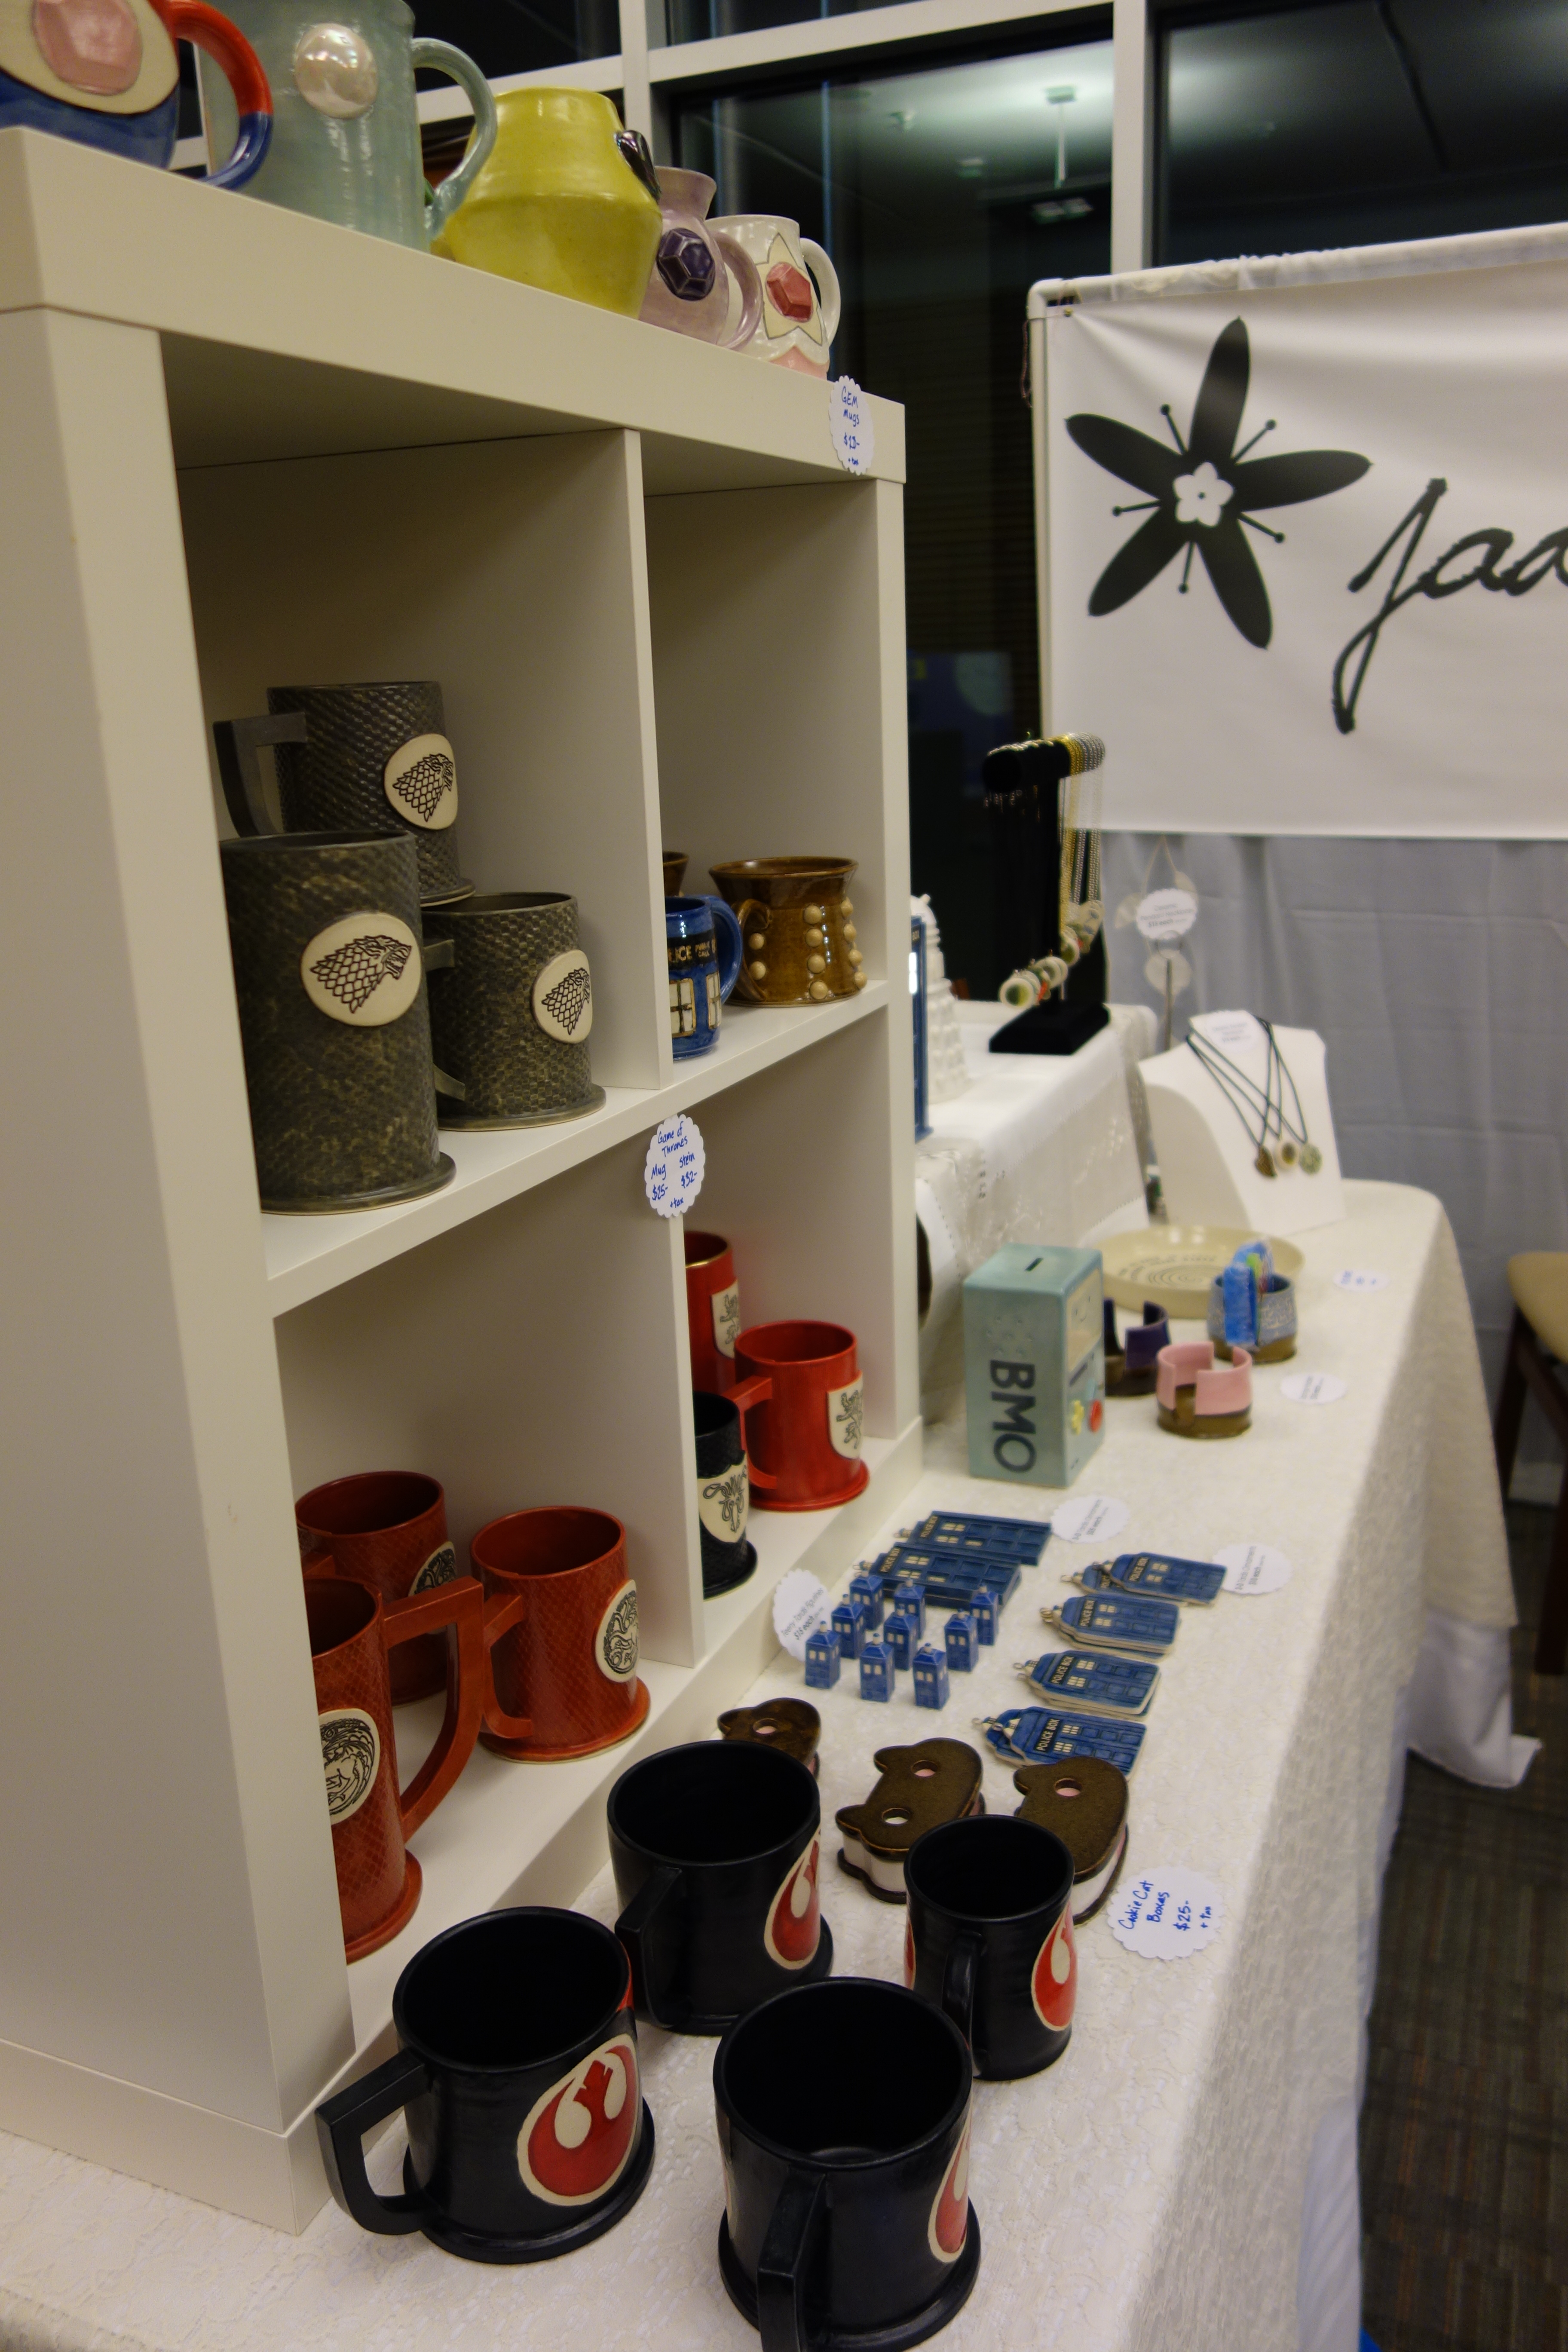
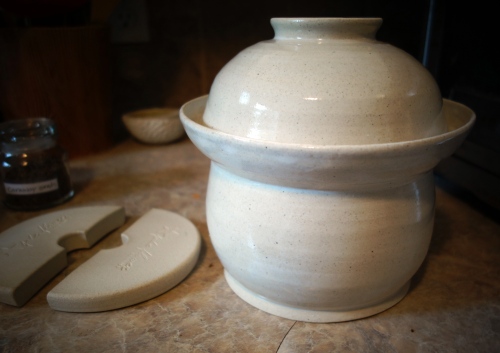
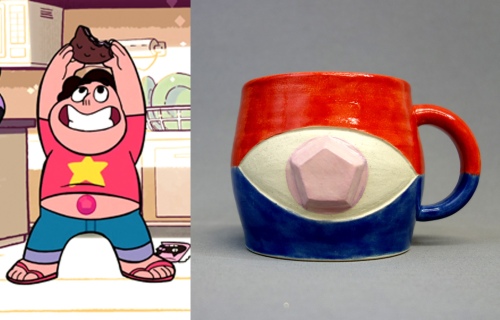
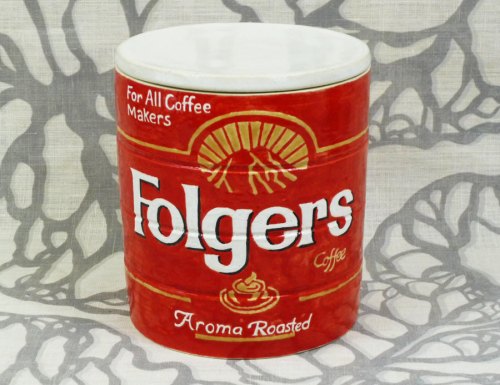
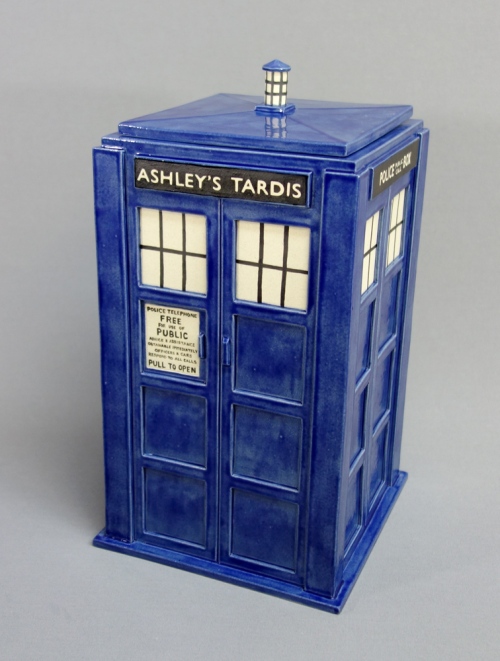
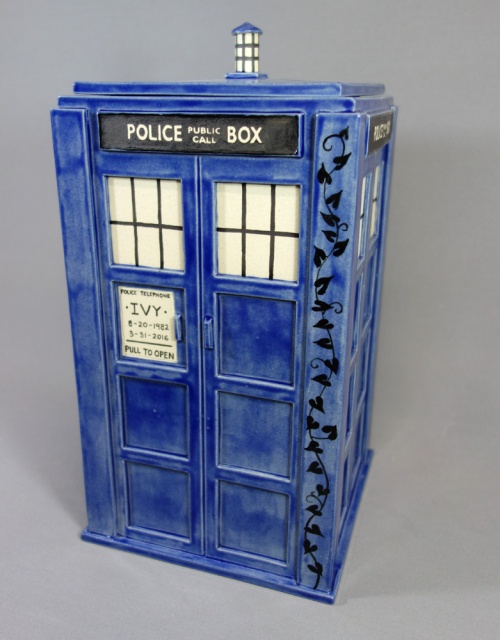
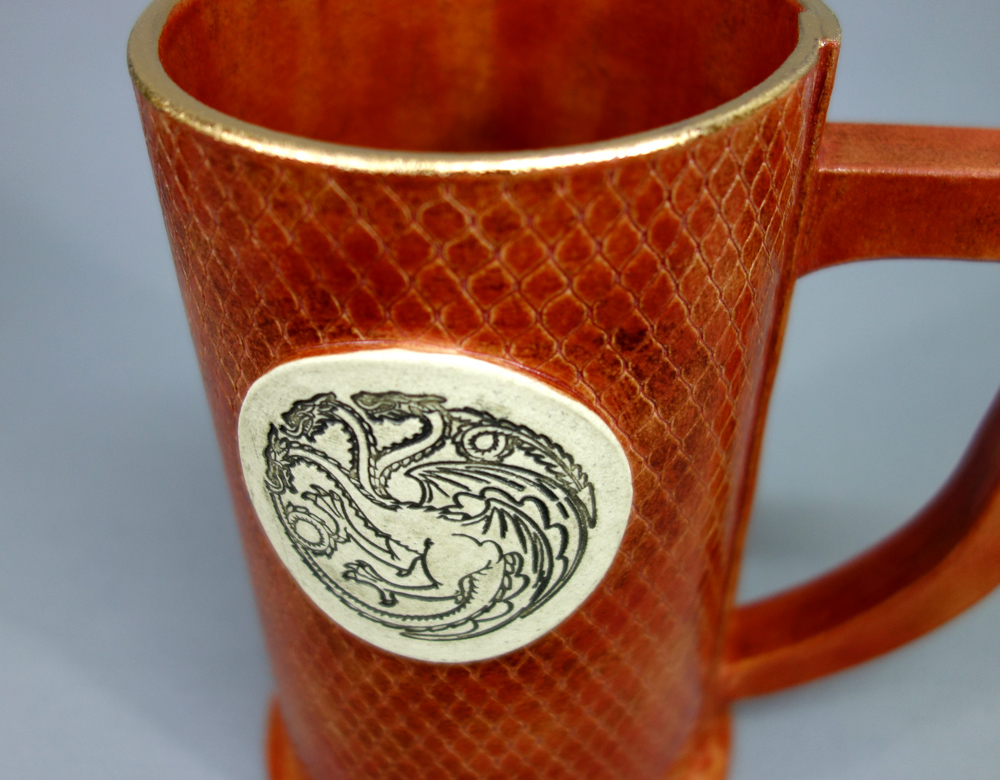
Mugs, Steins, and other goodies from the 2016 Kenmore Market

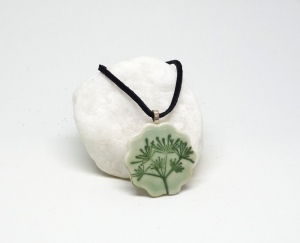
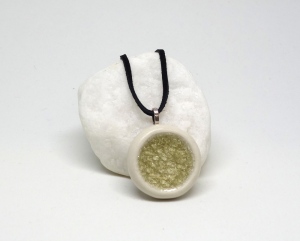
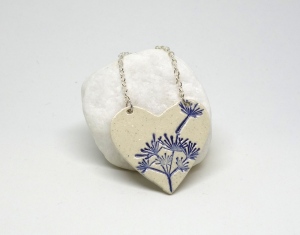
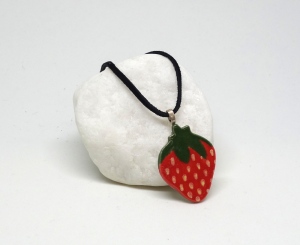
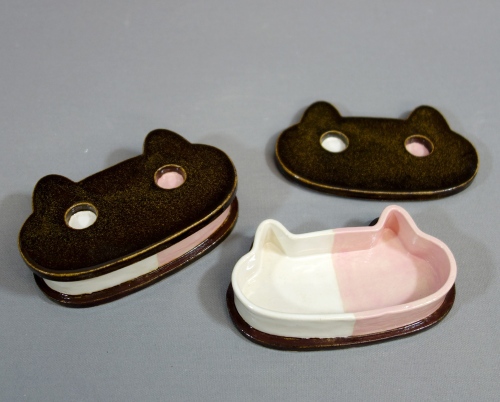
This year I’ll focus more on what I think holiday shoppers will want to take home with them – smaller items, tree ornaments, sparkly things! Small useful buys like ring dishes and spoon rests. These are all things that I don’t focus on in my Etsy shop, but it is really fun to shift my work to items like these for a bit out of the year!

IMG_3396 smaller

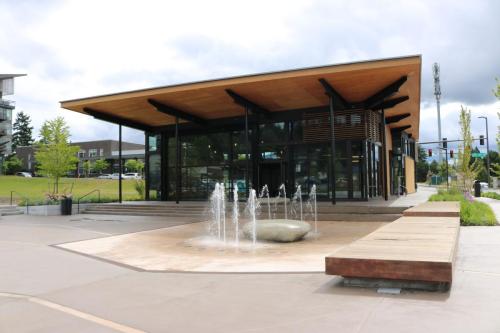
Kenmore WA Town Square and Hangar

Another fun detail for this year’s event will be the new Town Square! The holiday market will be located in the new Hangar building, which I think is very exciting. The Square wasn’t quite finished last year, so the market was hosted in the City Hall. We’ll see how the new space adds to the festivities!

For you locals in the area, I hope you’ll put the Kenmore Holiday Market on your calendar!

Kenmore Holiday Market and Tree Lighting
Saturday December 2, 2017
4:00-7:00 PM
@ Kenmore City Hall & Town Square
6728 NE 181st St, Kenmore, WA 98028


Leave a comment

Filed under Events, Holidays, Jadeflower Ceramics, Uncategorized

Ceramic pendant necklaces

Newest addition to my shop – a whole collection of handmade ceramic pendant necklaces!

dsc05804

Way back in 2009 when I was first feeling out what my Jadeflower Etsy shop would offer, I made all sorts of items. Many things that I no longer make. Necklaces and pendants were some of those things. I quickly discovered that Etsy has a plethora of jewelry makers! Ceramic jewelry certainly was not to become my main focus.
But after many years, I’ve decided that if I want to make a few pretty wearables, then why not?
dsc05819

My goal in this collection is to make cute, unique wearable art, while remaining affordable. Even with shipping factored in, each necklace is less than $20.

dsc05806

I have a mix of stamped/glazed ceramic pendants and fused-glass ceramic pendants.

dsc05810

Some I finished with gold or silver plated chain. And for some, I chose a more bohemian black suede cord.

dsc05809

dsc05805

These are casual, daily-wear necklaces that don’t take themselves too seriously. 🙂

dsc05814

It was lots of fun to get my tools out and do some jewelry making again! Each necklace is finished with a lobster clasp closure, and a 2-inch extension chain, which makes them adjustable between 18″ and 20″

dsc05841

Click any of the images to see more of that particular piece. To see the whole series, click HERE

dsc05881

So if you’re looking for a sweet piece of wearable art, please check out my new necklace collection. Makes a great gift for yourself or someone special!

Leave a comment

Filed under Etsy, Jadeflower Ceramics, Uncategorized

Experimentation with Fermentation! Part 2

My maiden name is Guenther, and my dad’s side of the family has a pretty German heritage, but somehow or other I don’t think I ever tasted sauerkraut until I was an adult. Most likely my mom, who is all Irish, didn’t fancy the stuff. So it just wasn’t something I ever ate as a kid, and I must have therefore figured it was a “yucky” food, and never sought it out. Until one day I was visiting some relatives on my own after college, and they had sauerkraut as a side dish. I enjoyed it from the first tentative bite! It was like pickles, sour and salty and a bit crunchy. I started buying it at the store from then on – not religiously, but when I remembered it as a flavorful condiment.

After learning more about fermented foods, recently, I have decided that homemade sauerkraut is the next project!
And not only that, but I decided I first needed to make my own ceramic crock to ferment it in, being that I am a potter, after all.

dsc04799w

My first attempt at a handmade fermentation crock

Now that I had a crock to ferment in, here’s the process I followed for homemade sauerkraut!

dsc04791w

Chopped Cabbage and Salt

I filled a huge bowl with chopped cabbage. Just one head, about 2 lbs. One head of cabbage was more volume than I expected! But then I added sea salt, probably about 3 teaspoons (I didn’t measure), and started squeezing the buhjeezus out of it.

dsc04793w

Massaging the salted cabbage

This got the cabbage all coated with the salt, and already it started drawing the water out. After walking away, and then coming back to repeat the massaging process every 10 minutes or so, the cabbage really started releasing its juices.

dsc04800w

Cabbage juices pooling in the bowl

After an hour of this, I felt the cabbage was sufficiently reduced in volume and wilted enough to start packing into the crock. I tossed in a teaspoon of caraway seeds (because Michael Pollan added some to his in Cooked), and then into the crock it went, handful by handful.

dsc04801w

Pounding down the cabbage

I used a cocktail muddler to really pound down the cabbage. This forces out the air, packing it down, and it gets the water to continue squeezing out of the cabbage. The cabbage juice (or brine) needs to be at a level above the solid cabbage; this protects the kraut from exposure to air, which can cause it to mold (bad).

dsc04804w

Weights to keep the kraut submerged below the brine level

Once I felt I’d pounded enough, and the cabbage was sufficiently juicy, I topped them off with two half circle ceramic weights I’d also made when I made the crock. These will keep the kraut from floating to the top and getting moldy. The bacteria that transform the cabbage in to sauerkraut prefer an oxygen-free environment, so that’s the environment I intended to create.

dsc04805w

Adding water to the moat creates an airlock

The photo above shows my little helper Ethan, pouring the water into the reservoir around the crock lid. The water will let CO2 out (it’ll “burp” to release pressure), but won’t allow any air to go in.

dsc04806w

My kitchen helper

Look how proud he is, helping Mama. Nevermind that he spilled most of the water on the counter, haha. By the way, how is it possible that this kid is two-and-three-quarters already?? Obligatory observation on how time flies.

dsc04820w

And now we wait…

So that’s it! Now my pretty little crock will live on the kitchen counter for a few weeks, and hopefully it will produce a yummy, probiotic sauerkraut!

And out in my studio I’m working on improving my design. Swing over to my Jadeflower Ceramics Etsy Site – I’ll have crocks like this (better, even!) for sale in my Etsy shop.

Here’s to my continuing fermentation adventure! Bye for now!


Leave a comment

Filed under DIY, Fermentation, food, Recipes, tutorial, Uncategorized

Experimentation with Fermentation! Part 1

I’ve recently gotten pretty immersed in the little-talked-about food world of fermentation. Fermented foods have been around for millennia, so why am I now just discovering this?? Anyway, I thought I’d share a bit about my new food hobby!

My interest was first piqued after watching “Cooked” on Netflix – Michael Pollan’s 4-part documentary series. It is really good, if you haven’t seen it yet! I was particularly intrigued by episodes 3 & 4 which went deep into our human history with Bread, and then with fermented foods. Incidentally, bread is historically a fermented food too! It’s only until recently that most breads are made with commercial yeast, rather than cultured sourdough.

I was so fascinated with the show, that I immediately checked out Pollan’s book (also titled Cooked). It’s a great read, I definitely recommend it. Like his other books, Michael Pollan has a great way of introducing not-so-commonly-know information that is both useful and insightful, as well as making the subject matter very relatable through personal anecdotes. Of course, after reading it (and before I even finished the book, really), I decided I wanted to challenge myself with some new cooking skills, and making my own wild sourdough bread and my own home ferments were first on the list. I checked out more books from the library.

Pollan’s book is great because it has a whole bibliography from which I could get more information. Readily available at my library was Sandor Katz’s Wild Fermentation which was a great starting book for someone new to the whole fermentation thing.

So far, I have successfully brought a bowl of flour and water to life! (Ahem, really not that miraculous, apparently) Leaving this bowl of flour goo on the counter for almost 2 weeks, I thought perhaps the wild yeasts and bacteria that I was promised are everywhere didn’t live in my home, or didn’t want me to make my own sourdough bread. But patience paid off, and I now have a happy, bubbly starter, still living on my counter (covered with a cloth most of the time).

dsc04795w

Sourdough Starter (wild fermentation!)

I feed it a bit of flour and water every day. I’ve made 5-6 loaves of bread thus far, two batches of English muffins, and pancakes. Not everything has been a rocking success, but I have made a few things I’m pretty proud of…like this loaf of bread.

dsc04774w

Whole wheat Sourdough Bread

Another fermenting experiment that is underway was one M wanted to do – homemade Mead. Apparently, mead is just about the easiest alcoholic ferment you can do – just mix honey and water and give it a stir every time you think of it.

dsc04796w

Mead fermenting in my blue Le Creuset Pitcher

And if you can use pretty crockery to do your fermenting, all the better! After 10 days of stirring and waiting, we’re finally starting to see some bubbling activity. Soon we’ll transfer to a bottle to finish the process.

dsc04797w

Tiny bubbles of CO2 in our honey water show us that fermentation is afoot!

My next adventure is to make homemade sauerkraut. But that’s a post for another day. Stay tuned for Experimentation with Fermentation Part 2!


Leave a comment

Filed under Books, food, Uncategorized

Steven Universe Love

It’s a funny thing, I probably watch fewer cartoons now that I’m an “adult” but I bet it’s not by much! There are so many great animated shows these days, and I’m not ashamed to say I love ’em.

One of my favorite current shows is Steven Universe. It is too adorable! And like my other fave show Adventure Time, even though the episodes are only 11 minutes long, they pack so much into them! Each episode is like a rich tapestry 😉

And no show can be any good without great characters, which Steven Universe has in abundance. Which brings me to the point of this blog post – I decided to start a ceramic mug series to pay homage!

So here are the ones I’ve made so far (and all are currently up in my Etsy Shop)

Steven and Mug

Steven Universe Ceramic Mug

Obviously I needed to make a mug of the title character. Goofy li’l Steven!

Rose Quartz and Mug

Rose Quartz Mug

Steven’s mother, Roze Quartz. I love everything about her character design.

Pearl and Mug

Pearl Mug

What can I say about Pearl? Well, when I made her mug, I focused on her upright nature, a little no-nonsense. But with a fancy handle – both for her spear and because, as we know, Pearl is a fancy pearl.

Garnet and Mug

Garnet Mug

Garnet’s mug was the most challenging. She has a lot going on. This mug can be enjoyed from many angles, this one highlights her start costume motif.

Amethyst and Mug

Amethyst Mug

And lastly, good ol’ Amethyst. Short and curvy, and very purple. She’s got it where it counts.

And because I couldn’t resist, another Steven Universe inspired item: A Cookie Cat trinket box. ^_^

DSC04436

Cookie Cat Ceramic Box

Can’t wait for more episodes later this July! Till then, I guess I’ll have to do some rewatching, and make new mugs 🙂 How about Ruby, Sapphire, Peridot and Lapis?

Leave a comment

Filed under ceramics, Etsy

A sampling of custom ceramic works

Oh my gosh, it’s been a really long time since I’ve written anything here! I think about it often, but never seem to find the time to put my thoughts and ideas down in a blog post!

That’s life with a 2-year-old, I guess.

Anyways, I’ve been thinking about some of the great custom pieces I’ve made in the last couple years that don’t get seen by anyone but the customer. I thought it would be cool to post some pictures of them here. Interestingly, a lot of very special, unique pieces have been cremation urns.

P1080080

Coffee Can urn, a la The Big Lebowski

A lot of intricate glaze-work went into this Folgers Coffee Can Urn. Someone was a fan of the Big Lebowski

This Minions piece was very special – an urn for a very young person who loved the Despicable Me movies. It was a labor-intensive piece to  build, but I think it turned out wonderfully. I hope it brought the family a little peace.

But by far, the personalized urns I make the most are Tardis urns. Adding names and dates and other special details makes each Tardis unique.

DSC03418

Large Tardis Urn

DSC04262

Tardis Urn with added Ivy filigree

You can find these Tardis Jars here on my Etsy site: Made-To-Order Large Tardis Jar

Being able to make special, custom and personalized pieces for people is one of the joys of doing what I do. I hope you enjoyed seeing these!


2 Comments

Filed under ceramics, Jadeflower Ceramics, projects

New Summer Pricing in my Etsy Shop!

Hey there! Hope the beginning of summer is treating you well!

I’ve been enjoying the Pacific Northwest’s excellent early summer – super long days, and weather in the 70s. Little Ethan is keeping me busy playing outside, but I’m also getting as much studio work done as possible. And to celebrate summer, I’m lowering my prices on a whole bunch of my items!

Summer pricing banner

This includes many of my Doctor Who Tardis pieces and my new Game of Thrones inspired mugs and steins!

GoT Stark SteinGoT Lannister mugGoT Targaryen Stein

I’ve also done some spring cleaning in my studio, and pulled out a few older items and put them WAY WAY on sale. Time to make some room for new items! So I hope you’ll click over to my shop (https://www.etsy.com/shop/jadeflower) to check out what’s new!

Leave a comment

Filed under Uncategorized

I’m finally on Instagram!

Hi, folks who may still check in here periodically! I know I’ve totally dropped off with posting to my blog here. What with taking care of a little one full time as well as trying to keep my business running at a somewhat productive level, it’s been really hard to find the energy and organization to write posts! It’s an excuse, I know.

So, to make things a little more instantaneous, M suggested I get on board with Instagram. That way I can take photos during my day (mostly work-related: ceramic projects I’m working on, in-progress stuff, and fun new stuff coming out of my kiln). Then, getting the content on-line happens right away! Crazy. (Yes, I know I’m super late to this bandwagon – I just never had a device that supported Instagram up till this point).

So now, if you want to see what I’m doing on a more regular basis, follow me at https://instagram.com/jadeflowerceramics. Or like my Facebook page! All my Instagram pics will show up there too. 🙂

And every once in a while I might snap a pic of this cutie too:


Leave a comment

Filed under Day to Day, Jadeflower Ceramics

DIY Pull-over Bib with a Bow Tie

OK, so having a baby now doesn’t give me as much time to do the millions of things I have swimming around in my head. But here’s a project I absolutely forced myself to carve out time for.

DIY Bib with bow tie

The little guy is a big drooler at the moment (he’s almost 4 months now, so I guess teething is a thing that starts around now?) and he basically soaks through 2-4 bibs a day. A lot of the bibs that he was gifted (usually as a set with a matching onesie) are teeny, and not really very useful. But two that we got were basically towels with a hole cut out for his head. Ah Ha. So I decided to try my hand at a cute version  – with a bow tie! Perfect for those “special” occasions, ya know. (Seriously, with wedding season coming up, not to mention just fun holidays and stuff, this little extra detail will be my one effort to cute-en him up).


Pull-over Bib with Bow Tie Tutorial
Materials:
>terry cloth (I bought1/2 yard at the fabric store, but you could easily use a towel)
>backing material (on my first bib, I just used another layer of terry cloth. on this one I used polar fleece)
>double bias tape
>stretchy rib-knit fabric for the collar
>colorful fabric for the bow tie
>thread, pins, scissors & sewing machine

bib fabricStep ONE
Cut out your terry cloth and backing fabric to 15″ x10″


cut head holesStep TWO
Cut out the hole for the head. My babe is about 4 months, and I wanted the bib to be somewhat snug while still comfortably fitting over his head. I made the opening diameter 5 inches. Positioned 2″ from the top and centered from side to side.


two layers sewn togetherStep THREE
Pin together your two layers (right sides facing outward). Sew a 1/4″ hem all the way around, and radius your corners (I used a light colored pen to mark the corners as a guide).


Trim the fabricStep FOUR
Trim your shape to about 1/8″ from your stitching. This will get covered up by bias tape later. Pin around the neck hole.


Pin bias tapeStep FIVE
Sew around the neck hole with a V stitch (or use a serger). Then pin your bias tape around the perimeter of the bib. (This is a pretty good tutorial on how to sew with double bias tape and not have it turn out all wonky)


bias tape addedStep SIX
Stitch on the bias tape!


assembling the collarStep SEVEN
Cut a strip of knit ribbing 2.5″ x 11″. Fold it in half and sew the ends together with a V stitch. Then fold the whole thing over like a turtle neck.


pin collar to the neck holeStep EIGHT
Pin the knit collar to the neck hole, matching the tops, bottoms and two sides. This will keep the stretch of the collar uniform.


collar attatchedStep NINE
Sew the collar to the neck hole with a V stitch, making sure the sewn part happens on the back side of the bib. (This was probably the trickiest part of this project for me.)
And there you have a functional bib!

…and here’s adding the bow tie detail…

rectangle for the bow tieStep TEN
With your colorful fabric, cut a 5″ x 4.5″ rectangle. Fold lengthwise, right sides facing inward. Stitch almost all the way around with a 1/4″ seam allowance, leaving enough of a hole to flip the rectangle right-side-out. Once it’s flipped right-side-out, fold in your opening hole, and then stitch all the way around as close to the edge as you can.

sew the tie middleStep ELEVEN
Sew a tube for the middle of the bow tie. I did mine from a long rectangle 2.5″ wide, giving me a 1″ strip when it was turned right-side-out.

pinch the middle to make a bow shapeStep TWELVE
Pinch the middle of the big rectangle (like an accordion fold) and wrap the smaller fabric strip around it. Trim off the excess from the strip, and stitch it into place. Now you have your bow tie!

attatch the bow tie to the bibStep THIRTEEN
Position the bow tie pretty close to the collar and pin into place. Hand-stitch all around to secure in place (this will keep little hands from grabbing loose edges and pulling the bow tie off, with their orangutan strength).


And there you have it! Slip the bib over your little one’s noggin and enjoy the cuteness. (Pay no attention to the crazy-eyed daddy)
bow tie bib

Something I learned while making this bib – terry cloth is MESSY! Cutting it will make a confetti of little cotton snow all over the place. And it will probably take a couple washings before the bib stops shedding them. Pbbt 😛

1 Comment

Filed under Baby, Crafts, DIY, projects, sewing, tutorial

A printable birthday card for Dad

Today is my Dad’s birthday, and I managed to find a little time to break out my old set of watercolors and paint him a card.

You know, that homemade touch. 🙂

DSC00951w

I haven’t painted for a really long time, but it was actually a watercolor class I took in college that made me choose Art as my major. Funny how things happen.

DSC00952w

After trying to find a simple card on the internet to download and print, I just couldn’t find something I really liked. So what to do? DIY, baby!
I chose to make it simple and childlike – lots of bright colors for this hot air balloon.

DSC00953wI don’t claim it as a great work of art, but I think my dad will enjoy it.
A little pen outlining to finish it off…

DSC00956w

And in case anyone else out there needs a fun and simple birthday card for their dad, I decided to layout a printable version. Free to download and print at home! Just print on cardstock, cut out, and fold down the middle.
Enjoy! Click to download: Dad bday Card

Leave a comment

Filed under projects